【Gem】Administrate
はじめに
こんにちは!大ちゃんの駆け出し技術ブログです。
管理画面の実装をずっとサボってたのですが、今更実装してみたところ思いの外簡単に実装できて、ここに記録しておきます。 gemって偉大だな。
実装手順
# Gemfile
gem "administrate"

$ bundle install
Fetching momentjs-rails 2.20.1
Installing momentjs-rails 2.20.1
Fetching datetime_picker_rails 0.0.7
Installing datetime_picker_rails 0.0.7
Fetching jquery-rails 4.4.0
Installing jquery-rails 4.4.0
Fetching kaminari-core 1.2.1
Installing kaminari-core 1.2.1
Fetching kaminari-actionview 1.2.1
Installing kaminari-actionview 1.2.1
Fetching kaminari-activerecord 1.2.1
Installing kaminari-activerecord 1.2.1
Fetching kaminari 1.2.1
Installing kaminari 1.2.1
コマンドを実行すると既に作成したモデルに合わせて管理画面のルーティングやそのコントローラを自動で作成してくれます。
$ rails generate administrate:install

route  namespace :admin do
    resources :users
    resources :ranking_block_likes
    resources :text_block_likes
    resources :profile_blocks
    resources :favorite_block_likes
    resources :yes_or_no_blocks
    resources :ranking_blocks
        ・
        ・
        ・

    root to: "users#index"
  end

create  app/controllers/admin/application_controller.rb
      create  app/dashboards/user_dashboard.rb
      create  app/controllers/admin/users_controller.rb
      create  app/dashboards/ranking_block_like_dashboard.rb
      create  app/controllers/admin/ranking_block_likes_controller.rb
      create  app/dashboards/text_block_like_dashboard.rb
      create  app/controllers/admin/text_block_likes_controller.rb
      create  app/dashboards/profile_block_dashboard.rb
      create  app/controllers/admin/profile_blocks_controller.rb
      create  app/dashboards/favorite_block_like_dashboard.rb
      create  app/controllers/admin/favorite_block_likes_controller.rb
      create  app/dashboards/yes_or_no_block_dashboard.rb
      create  app/controllers/admin/yes_or_no_blocks_controller.rb
      create  app/dashboards/ranking_block_dashboard.rb
      create  app/controllers/admin/ranking_blocks_controller.rb
            ・
            ・
            ・
モデル一つに対し、1つのコントローラ + 専用のdashbord.rbを生成しています。
app/controllers/admin/foos_controller.rb
app/dashboards/foo_dashboard.rb
ちなみに、Adminisitrateを導入後にモデルを追加したあとは下記コマンドを実行すれば同様に自動作成を行ってくれるようです。
$ rails generate administrate:dashboard <追加したモデル名>
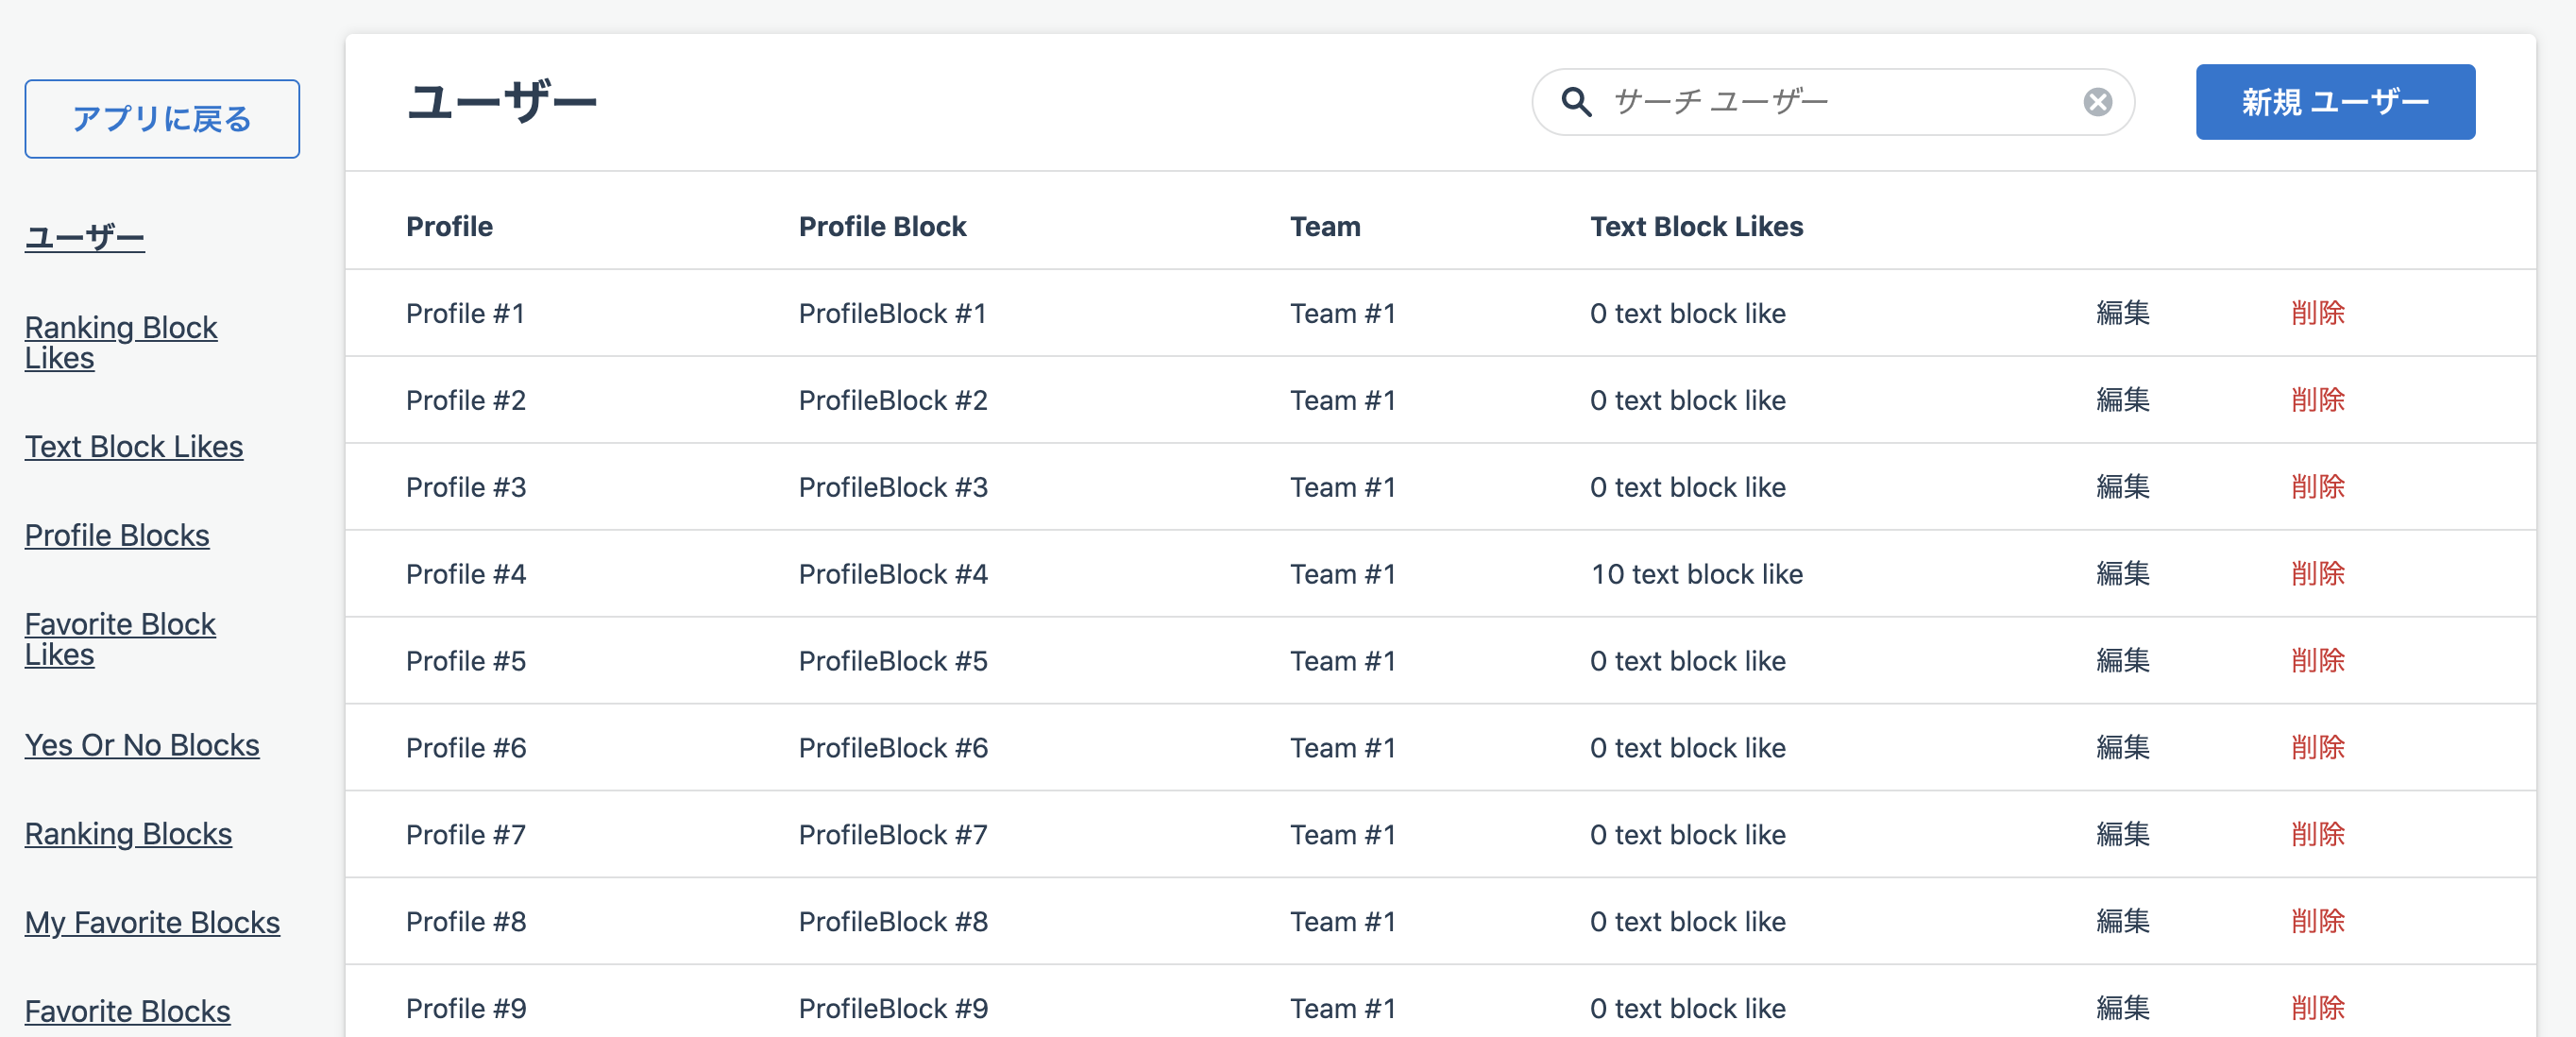
これだけでなんと管理画面がもう既にできています!!
http://localhost:3000/adminにアクセスしてみましょう。
他の管理gemもこれぐらい簡単に実装できるのでしょうか、、。gemの偉大さに改めて気づかされました。
しかし、今はなんの認証もなしにアクセスできてしまいます。そのため認証機能をつけてみましょう。有名ログインのgemであるPunditで認証機能を付けてみたいと思います。
マイグレーションを戻してroleカラムをuserに追加
t.integer :role, null: false, default: 1
enum型でuser.rbに定義しましょう。
enum role: { admin: 0, general: 1 }
Punditを使用してAdmin用のPolicyを作成します。
class Admin::ApplicationPolicy < ApplicationPolicy
  def initialize(current_user)
    @current_user = current_user
  end

  def authenticate_admin?
    current_user.admin?
  end

  private

  attr_reader :current_user
end
あとは先ほど自動作成されたAdmin::ApplicationControllerに対して管理者でないユーザーがアクセスしようとした時にルートパスにリダイレクトするようにします。authenticate_user!はおなじみのdeviseのメソッドです。ログインしていないユーザーもアクセスできないようにしています。
module Admin
  class ApplicationController < Administrate::ApplicationController
    before_action :authenticate_user!
    before_action :authenticate_admin

    def authenticate_admin
      redirect_to root_path unless Admin::ApplicationPolicy.new(current_user).authenticate_admin?
    end

    # Override this value to specify the number of elements to display at a time
    # on index pages. Defaults to 20.
    # def records_per_page
    #   params[:per_page] || 20
    # end
  end
end
これでadminの権限を持ったユーザーのみがnameスペースのadmin配下のリソースにアクセスすることができるようになりました。
他のgemとの互換性
他のgemとの互換性でいくつか自分で修正する必要がある箇所があったのでそこも紹介しておきます。
public uid
私は別でpublic_uidというgemを使用していたため、まずはコントローラのカスタマイズが必要でした。
Admin::ProfilesControllerに渡されるparams配下の通り。プロフィールを検索する方法はparamsのidが698c654b62のようにuidの値を参照して渡されていました。
params
=> <ActionController::Parameters {"controller"=>"admin/profiles", "action"=>"show", "id"=>"698c654b62"} permitted: false>
そのため、idが見つからないというエラーが返却されます。
Completed 404 Not Found in 6ms (ActiveRecord: 0.6ms | Allocations: 4279)
ActiveRecord::RecordNotFound - Couldn't find Profile with 'id'=698c654b62:
よってコントローラ をカスタマイズする必要ががありました。 幸いにもリソースを検索するメソッド(find_by)をオーバーライドする方法が各Admin::HogeControllerの中にコメントアウトで記載されていました。
# Override this method to specify custom lookup behavior.
# This will be used to set the resource for the `show`, `edit`, and `update`
# actions.
#
# def find_resource(param)
#   Foo.find_by!(slug: param)
# end
showアクション、editアクション、updateアクションでのリソースの検索に使われる方法をオーバーライドするためにはfind_resourceをオーバーライドすればいいとのことでした。ですので実際にidから検索するのではなくuidからリソースを検索するようにします。
def find_resource(param)
  Profile.find_by!(public_uid: param)
end
これでActiveRecord::RecordNotFoundのエラーは出なくなりました。
active_hash
しかしながら次に更なるエラーが表示されました。
NameError - uninitialized constant PrefectureDashboard
NameErrorと表示されました。「PrefectureDashboardがないよ」
このprefectureは実際にはモデルとしてテーブル登録していません。active_hashを使用してクラスのみ定義しています。
# prefecture.rb
class Prefecture < ActiveHash::Base
  self.data = [
    { id: 1, name: '北海道' }, { id: 2, name: '青森県' }, { id: 3, name: '岩手県' },
    { id: 4, name: '宮城県' }, { id: 5, name: '秋田県' }, { id: 6, name: '山形県' },
    { id: 7, name: '福島県' }, { id: 8, name: '茨城県' }, { id: 9, name: '栃木県' },
    { id: 10, name: '群馬県' }, { id: 11, name: '埼玉県' }, { id: 12, name: '千葉県' },
    { id: 13, name: '東京都' }, { id: 14, name: '神奈川県' }, { id: 15, name: '新潟県' },
    { id: 16, name: '富山県' }, { id: 17, name: '石川県' }, { id: 18, name: '福井県' },
    { id: 19, name: '山梨県' }, { id: 20, name: '長野県' }, { id: 21, name: '岐阜県' },
    { id: 22, name: '静岡県' }, { id: 23, name: '愛知県' }, { id: 24, name: '三重県' },
    { id: 25, name: '滋賀県' }, { id: 26, name: '京都府' }, { id: 27, name: '大阪府' },
    { id: 28, name: '兵庫県' }, { id: 29, name: '奈良県' }, { id: 30, name: '和歌山県' },
    { id: 31, name: '鳥取県' }, { id: 32, name: '島根県' }, { id: 33, name: '岡山県' },
    { id: 34, name: '広島県' }, { id: 35, name: '山口県' }, { id: 36, name: '徳島県' },
    { id: 37, name: '香川県' }, { id: 38, name: '愛媛県' }, { id: 39, name: '高知県' },
    { id: 40, name: '福岡県' }, { id: 41, name: '佐賀県' }, { id: 42, name: '長崎県' },
    { id: 43, name: '熊本県' }, { id: 44, name: '大分県' }, { id: 45, name: '宮崎県' },
    { id: 46, name: '鹿児島県' }, { id: 47, name: '沖縄県' }
  ]
end
モデルではactive_hashのメソッドを用いてbelongs_to_active_hashとなっており、prefectureに属していることが明示されています。
# profile.rb
# active hash =============
  extend ActiveHash::Associations::ActiveRecordExtensions
  belongs_to_active_hash :prefecture
そのため、dashbord.rbではprefecture: Field::BelongsTo,と明示されており、これによりPrefectureDashboardがないとおかしいというエラーが返ってきてるというわけですね。
ATTRIBUTE_TYPES = {
  user: Field::BelongsTo,
  prefecture: Field::BelongsTo,
  id: Field::Number,
  height: Field::Number,
  gender: Field::Select.with_options(searchable: false, collection: ->(field) { field.resource.class.send(field.attribute.to_s.pluralize).keys }),
  blood_type: Field::Select.with_options(searchable: false, collection: ->(field) { field.resource.class.send(field.attribute.to_s.pluralize).keys }),
  birthday: Field::DateTime,
  day_of_joinning: Field::DateTime,
  public_uid: Field::String,
  created_at: Field::DateTime,
  updated_at: Field::DateTime,
}.freeze
しかし、原因がわかったとしても、「administrate active hash」などと検索しても何も出てきません。
しかし、登録していないモデルに対してカスタムでダッシュボードを作成する方法があるようです。(公式ドキュメントを参照したところ、自作でdashboardを作レル項目がありました。)
bundle exec rails g administrate:dashboard Prefecture
config/routes.rbに追記します。
namespace :admin do
    resources :users
    resources :prefectures

    root to: "users#index"
  end
とりあえずPrefectureDashboardで定義してみました。中のロジックは全く書いていません。
require "administrate/base_dashboard"

class PrefectureDashboard < Administrate::BaseDashboard

end
これでエラーになったプロフィール詳細画面に遷移すると、エラーにならずに詳細ページを表示できるようになりました!
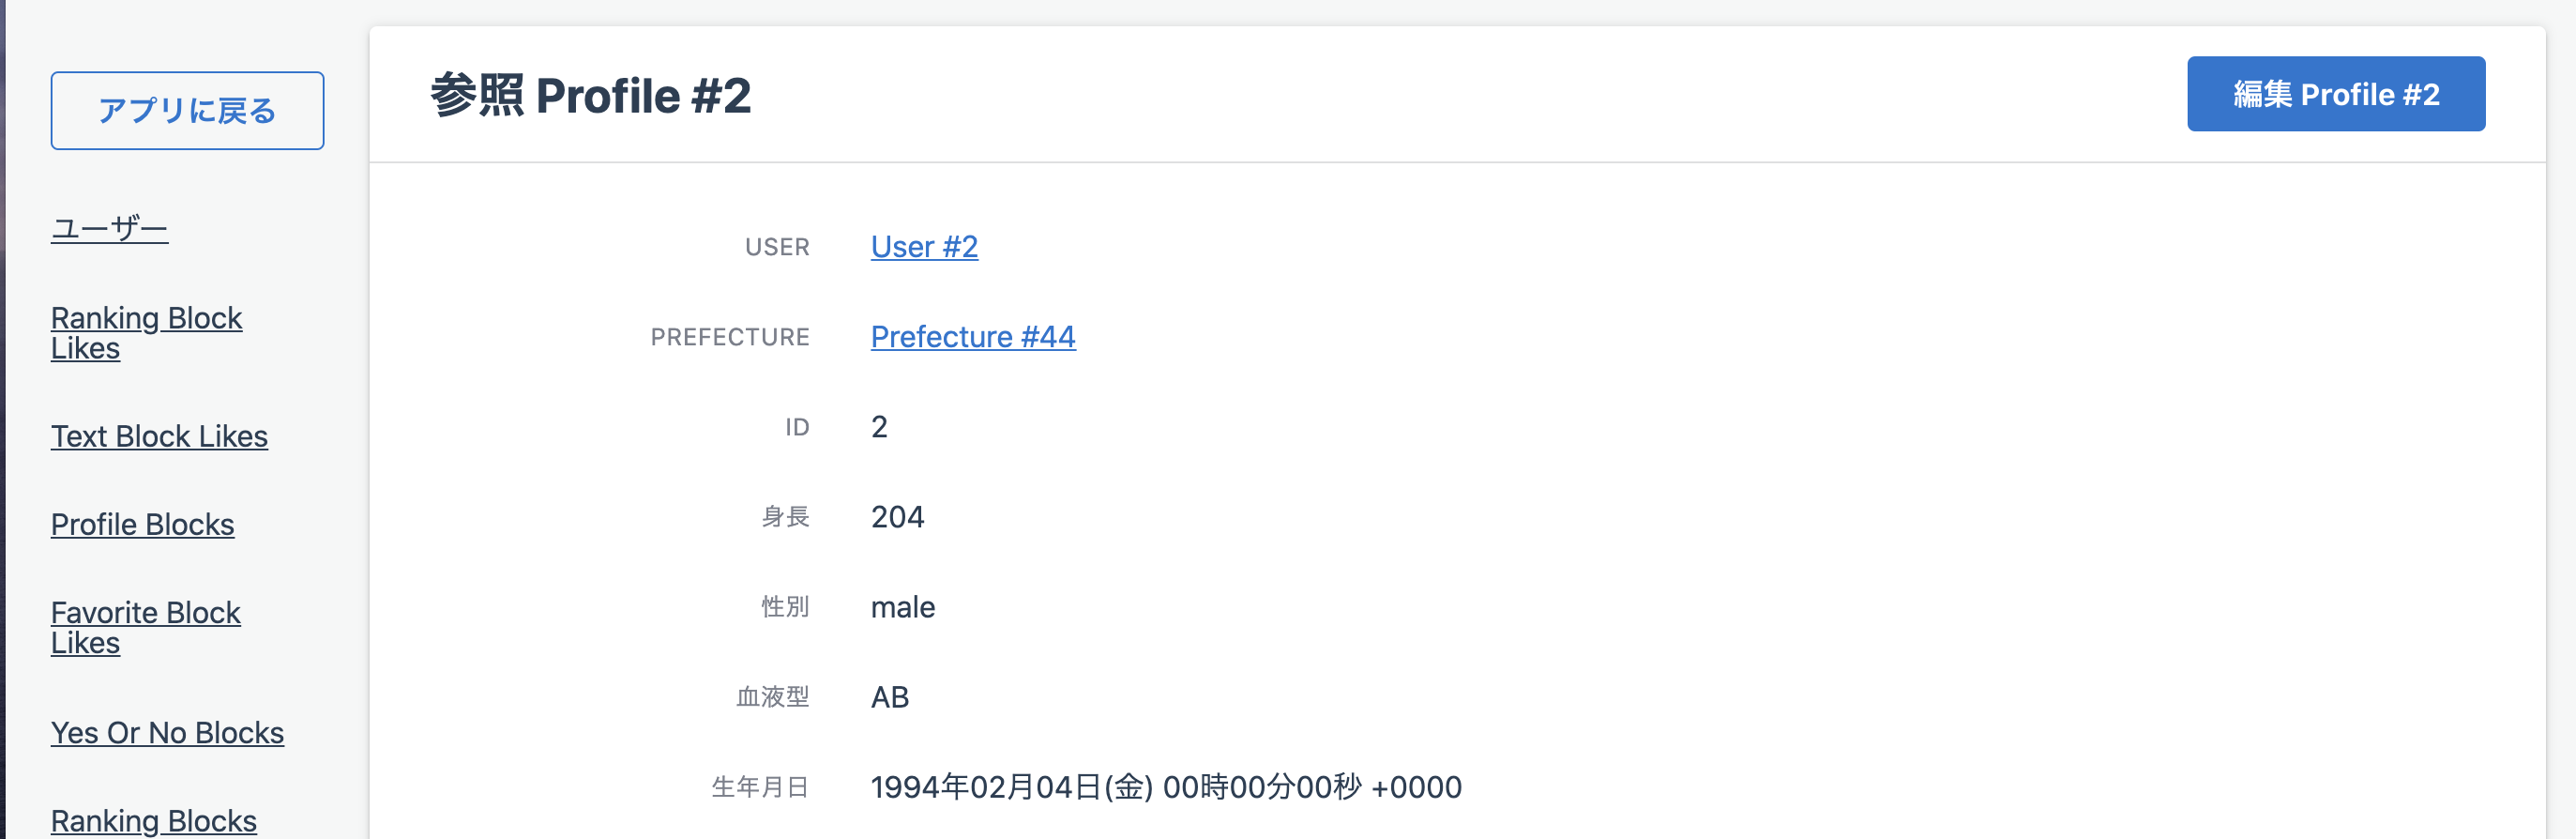
しかし、カスタムクラスに何も書いていないので当然prefectureの値はなく、画像の中のPrefecture #44をクリックするとエラーになります。
しかしPrefectureの値自体はactive_hashで静的なため、少し気持ち悪いですが一度ここまでにします。
実装方法が分かり次第改めて後述します。
参考記事
【Devise】パスワードリセット機能実装手順
はじめに
こんにちは!大ちゃんの駆け出し技術ブログです。
deviseでユーザ登録機能とログイン機能の実装に関する記事はたくさんありますが、deviseでパスワードリセット機能を実装したかったのですが思ったよりも記事の数が少なかったので自分で記事にしてみました。何かのお役に立てればと思います。なお、ログイン機能とユーザ登録機能については既にdeviseで実装済みであることを想定しています。
基本設定
まずはuser.rbにrecoverableを追加します。
devise :database_authenticatable, :registerable,
        :recoverable, :rememberable, :validatable, :omniauthable
また、deviseのマイグレーションファイルでrecoverableの箇所をコメントアウトしていた方はコメントアウトを外してuserのカラムに加えてください。
## Recoverable
  t.string   :reset_password_token
  t.datetime :reset_password_sent_at
  t.boolean  :allow_password_change, :default => false
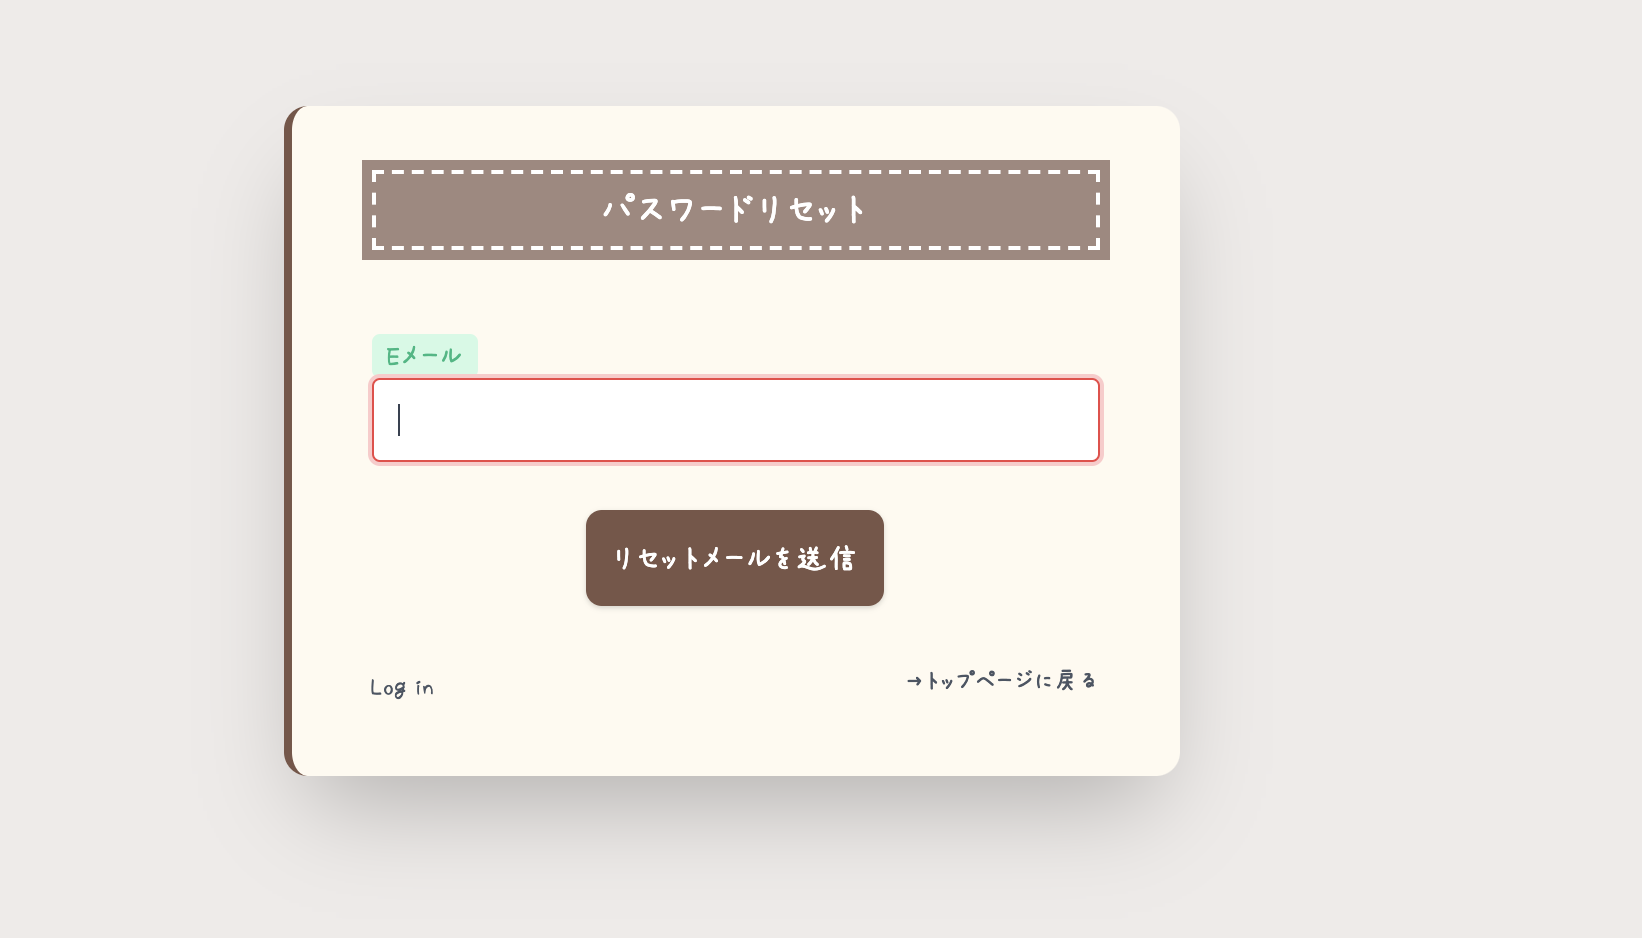
次にパスワードリセットメール送信画面のレイアウトを整えます。自分はtailwindとslimを使っているので以下の部分はtaiwindを使っている方のみコピペしてください。
/ app/views/users/passwords/new.html.slim
.flex.flex-col.items-center.justify-center.h-screen.select-none
  .flex.flex-col.-mt-32.bg-brown-50.px-6.sm:px-6.md:px-8.lg:px-10.py-8.rounded-xl.shadow-2xl.w-full.max-w-md.border-l-4.border-brown-600
    .text-xl.top-sub-title.text-center
      | パスワードリセット
    .mt-10
      = form_for(resource, as: resource_name, url: password_path(resource_name), html: { method: :post }) do |f|
        = render "users/shared/error_messages", resource: resource
        .relative.w-full.mb-3
          = f.label :email, class: 'form-label-basic-block'
          = f.email_field :email, autofocus: true, autocomplete: "email", class: "input-form-basic-block"
        .text-center.mt-6
          .actions
            = f.submit "リセットメールを送信", class: "p-3 rounded-lg bg-brown-600 outline-none text-white shadow w-auto justify-center focus:bg-brown-700 hover:bg-brown-500"
            = render  "shared/signup_links"
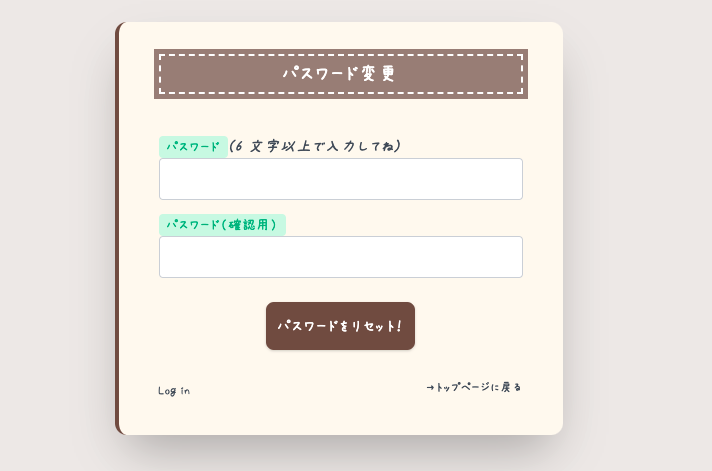
パスワードリセットを実際に行う画面のレイアウトはリセットトークンがないと遷移できない仕様となっているため見ることはできませんが、レイアウトを整えておきます。
.flex.flex-col.items-center.justify-center.h-screen.select-none
  .flex.flex-col.-mt-32.bg-brown-50.px-6.sm:px-6.md:px-8.lg:px-10.py-8.rounded-xl.shadow-2xl.w-full.max-w-md.border-l-4.border-brown-600
    .text-xl.top-sub-title.text-center
      | パスワード変更
    .mt-10
      = form_for(resource, as: resource_name, url: password_path(resource_name), html: { method: :put }) do |f|
        = render "users/shared/error_messages", resource: resource
        = f.hidden_field :reset_password_token
        .relative.w-full.mb-3
          = f.label :password, class: 'form-label-basic-block'
          - if @minimum_password_length
            em
              | (
              = @minimum_password_length
              |  文字以上で入力してね)
          = f.password_field :password, autofocus: true, autocomplete: "new-password", class: "input-form-basic-block"
        .relative.w-full.mb-3
          = f.label :password_confirmation, class: 'form-label-basic-block'
          = f.password_field :password_confirmation, autofocus: true, autocomplete: "new-password", class: "input-form-basic-block"
        .text-center.mt-6
          .actions
            = f.submit "パスワードをリセット!", class: "p-3 rounded-lg bg-brown-600 outline-none text-white shadow w-auto justify-center focus:bg-brown-700 hover:bg-brown-500"
            = render  "shared/signup_links"
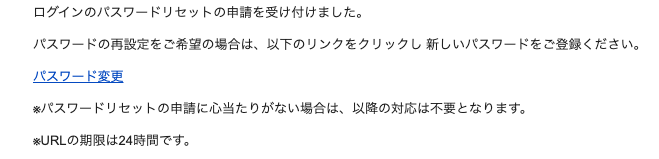
パスワードの変更メールを作成します。edit_user_password_urlで変更画面への遷移をするようにします。reset_password_tokenがないと編集画面に遷移できないため、必ずリンクにreset_password_tokenを含めてください。
p
  = @resource.email
  | 様
p
  | ログインのパスワードリセットの申請を受け付けました。
p
  | パスワードの再設定をご希望の場合は、以下のリンクをクリックし 新しいパスワードをご登録ください。
p
  = link_to 'パスワード変更', edit_user_password_url(@resource, reset_password_token: @token)
p
  | ※パスワードリセットの申請に心当たりがない場合は、以降の対応は不要となります。
p
  | ※リンクの有効期限は24時間です。
ちなみにパスワードリセットのリンクの有効期限はデフォルトで6時間となっていますが、devise.rbで変更可能です。
# Time interval you can reset your password with a reset password key.
# Don't put a too small interval or your users won't have the time to
# change their passwords.
config.reset_password_within = 24.hours
これで基本設定は完了です。
メールアドレスの作成
開発アプリ用のメールアドレスを作成しましょう。基本的には以下の英語文献の記事を参照すれば実装できます。
Getting Devise to send reset password link
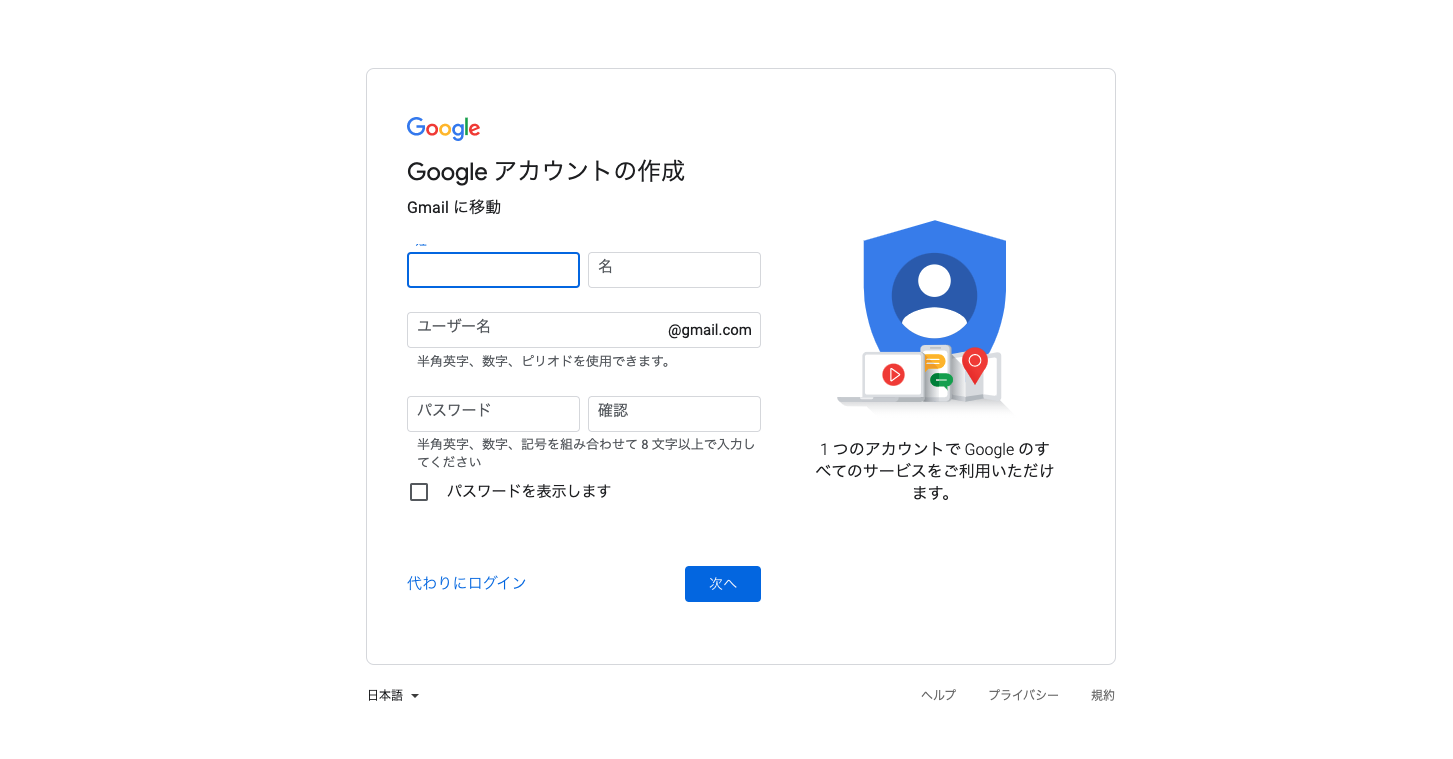
gmailのアカウント作成をします。ユーザ名などはお任せします。使用されていないgmailアドレスを登録してください。
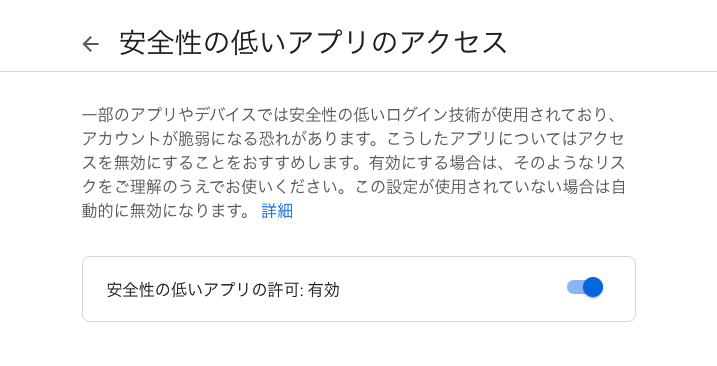
登録後、アカウントの設定でhttps://myaccount.google.com/lesssecureappsにアクセスします。ここで安全性の低いアプリのアクセスを有効にすることで開発環境からのアクセスを許可します。
環境変数を管理するdotenvをインストールします。
gem 'dotenv-rails'
.envファイルを作成し、そこに登録したメールアドレスとパスワードを記載します。
GMAIL_USERNAME = hoge@gmail.com
GMAIL_PASSWORD = hogehogehogehoge
.envファイルはコミットされないようにgitignoreで設定します。
# .gitignore
.env
development.rbで以下の設定を行います。
# config/environments/development.rb
config.action_mailer.default_url_options = {  host: 'localhost', port: 3000 }
  # mail setting
  config.action_mailer.raise_delivery_errors = true
  config.action_mailer.delivery_method = :smtp
  config.action_mailer.smtp_settings = {
    :address => "smtp.gmail.com",
    :port => 587,
    :user_name => ENV["GMAIL_USERNAME"] ,
    :password => ENV["GMAIL_PASSWORD"] ,
    :authentication => :plain,
    :enable_starttls_auto => true
  }
これによりメールの送信が登録したアドレスで行えるようになりました。
実装確認
まずパスワードリセット画面で開発環境で実際にユーザ登録済みのメールアドレスを入力してください。完了したら送信ボタンを押します。
するとターミナル上でメール送信の処理が行われていることがわかります。
Devise::Mailer#reset_password_instructions: processed outbound mail in 19.0ms
Delivered mail 60a598b8236ca_b8513fd849f29f48480ad (3861.7ms)
Date: Thu, 20 May 2021 08:01:12 +0900
From: please-change-me-at-config-initializers-devise@example.com
Reply-To: please-change-me-at-config-initializers-devise@example.com
To: hoge@gmail.com
Message-ID: <60a598b8236ca_b8513fd849f29f48480ad.mail>
Subject: =?UTF-8?Q?=E3=83=91=E3=82=B9=E3=83=AF=E3=83=BC=E3=83=89=E3=81=AE=E5=86=8D=E8=A8=AD=E5=AE=9A=E3=81=AB=E3=81=A4=E3=81=84=E3=81=A6?=
Mime-Version: 1.0
Content-Type: text/html;
 charset=UTF-8
Content-Transfer-Encoding: base64
送信したメールアドレスを確認しましょう。実際にメールが届いていることが確認できます。反対に、登録したgmailアドレスの方を確認すると、送信済みボックスに同様のメールが送られていることが確認できます。
パスワードの変更リンクをクリックするとパスワード変更画面に遷移します。
ここで新しいパスワードを入力することでパスワードのリセット及びサインインを同時に行ってくれます。deviseのよしなにやってくれている機能は本当にすごいですね!
【備忘録】deviseの通常ログインは先に実装しましょう
はじめに
こんにちは!大ちゃんの駆け出し技術ブログです。
自分のPFがslackログインのみでしたが、それに通常ログイン機能を加えました。deviseを使用した認証の実装では本来通常ログイン ⇒ 外部認証の順番で実装を行うかと思います。しかし、自分は既にslack認証を実装していたので通常ログインとの互換性に差異があり、少しつまづいてしまったのでこの記事で記録しておきます。
導入前のUserモデルの影響
導入前のUserモデルのバリデーションの設定です。
validates :name,                      presence: true
validates :email,                     presence: true, uniqueness: { case_sensitive: true }
validates :provider,                  presence: true
validates :uid,                       presence: true, uniqueness: { case_sensitive: true }
validates :encrypted_password,        presence: true

belongs_to :team
slack認証を実装していたので、providerとuidがslack認証時に追加されます。そのため、providerとuidは共に必須カラムとしていました。
def self.from_omniauth(auth, user_info)
  user = find_or_initialize_by(provider: auth.provider, uid: auth.uid)
  user.password = Devise.friendly_token[0, 20] # ランダムなパスワードを作成
  user.name = user_info.dig('user', 'name')
  user.email = user_info.dig('user', 'email')
  user.image = user_info.dig('user', 'image_192')
  user.check_team_existence(user_info.dig('team'))
  user.save!
  user
end
また、belongs_to :teamとあるようにslackのワークスペースにユーザーが所属する設定をしています。
後々この3つのprovider, uid, team_id(team)が既に存在していたために通常ログインフローで引っかかりました。
いざ実装
deviseの記事はググればいくらでも出てくるので基本的deviseの導入は割愛します。
ユーザー登録画面は以下のように実装しました。deviseで生成されるerbファイルをslimに変換しています。
h2
  | Sign up
= form_for(resource, as: resource_name, url: registration_path(resource_name)) do |f|
  = render "users/shared/error_messages", resource: resource
  .field
    = f.label :name
    br
    = f.text_field :name, autofocus: true, autocomplete: "name"
  .field
    = f.label :email
    br
    = f.email_field :email, autofocus: true, autocomplete: "email"
  .field
    = f.label :password
    - if @minimum_password_length
      em
        | (
        = @minimum_password_length
        |  characters minimum)
    br
    = f.password_field :password, autocomplete: "new-password"
  .field
    = f.label :password_confirmation
    br
    = f.password_field :password_confirmation, autocomplete: "new-password"
  .field
    = f.label :image
    br
    = f.file_field :image, autofocus: true, autocomplete: "image"
  .actions
    = f.submit "Sign up"
= render "users/shared/links"
さてさて、通常通りにこれを登録しようとしてもエラーになります。表示されるエラーメッセージは元Userモデルのバリデーション が影響したものです。
- チームを入力してください
- uidを入力してください
- providerを入力してください
providerとuidについてはnull: false, presence: trueを取る他に方法がないかなと思いました。これらはslackログインの時に取得できますので、通常ログイン時との互換性を合わせるなら必須カラムを解除するしかないなと。
validates :name,                      presence: true
validates :email,                     presence: true, uniqueness: { case_sensitive: true }
validates :encrypted_password,        presence: true

belongs_to :team
問題はteamの方です。belongs_to :teamをコメントアウトで消すわけにはいきませんし、、、
問題はuserに属するteamがuser登録時に存在しないことです。なのでゴリ押しで先にデフォルトのチームデータを入れ、userのデフォルトのteam_idをマイグレーションファイルに記述しました。(絶対ベストプラクティスじゃない、、、)
t.references :team, foreign_key: true, :default => "1"
結論
今回のようにゴリ押しする他実装方法がないのはdeviseのログインの実装を外部認証⇒通常ログインの順番で実装したためです。通常ログイン⇒外部認証で実装を行った方が、後々の互換性を合わせる際に楽になるかと思います。結論、普通に通常ログインから実装しようという話でした。
【Firebase】【実装編】slack認証
はじめに
こんにちは!大ちゃんの駆け出し技術ブログです。
先日Firebaseを使用したslack認証の設計についての記事の続きになります。
【Firebase】Sign in with Slackの実装方法(設計) - 大ちゃんの駆け出し技術ブログ
今回からいよいよ実装編ということでslack認証をFirebase上で実際に行っていきたいと思います。
最終的にはRails APIと連携するので、下記の図でいうところの①、②の部分です。
https://storage.googleapis.com/zenn-user-upload/8y1fnnmxt33siqkhu2bn6etkzp2y
Rails API×Firebase authの場合、Railsは何をすべきなのかを考えた【設計編】
Firebaseアプリ開発の準備
まず、firebaseのサーバー上で起動するfunctionsをローカルで開発していきます。基本的には公式さんの動画に沿って行います。
https://www.youtube.com/watch?v=DYfP-UIKxH0
まず、ターミナルでnodeのバージョンを確認してください。
【ターミナル】
$ node --version
v14.16.0 // 9.0以上
$ npm --version
6.14.11  // 5.0以上
次にローカルにfirebase-toolsをインストールします。
$ npm install -g firebase-tools
npm WARN deprecated request@2.88.2: request has been deprecated, see https://github.com/request/request/issues/3142
npm WARN deprecated har-validator@5.1.5: this library is no longer supported
/usr/local/bin/firebase -> /usr/local/lib/node_modules/firebase-tools/lib/bin/firebase.js

> re2@1.15.9 install /usr/local/lib/node_modules/firebase-tools/node_modules/re2
> install-from-cache --artifact build/Release/re2.node --host-var RE2_DOWNLOAD_MIRROR || npm run rebuild

Trying https://github.com/uhop/node-re2/releases/download/1.15.9/darwin-x64-83.br ...
Writing to build/Release/re2.node ...
Done.

> protobufjs@6.11.2 postinstall /usr/local/lib/node_modules/firebase-tools/node_modules/protobufjs
> node scripts/postinstall

+ firebase-tools@9.10.2
added 660 packages from 418 contributors in 42.985s

$ firebase --version
9.10.2 // versionの確認
そのあとローカル上fでfirebase loginコマンドを実行します。
$ firebase login
i  Firebase optionally collects CLI usage and error reporting information to help improve our products. Data is collected in accordance with Google's privacy policy (https://policies.google.com/privacy) and is not used to identify you.

? Allow Firebase to collect CLI usage and error reporting information? Yes // Yesを選択
i  To change your data collection preference at any time, run `firebase logout` and log in again.

Visit this URL on this device to log in:
https://accounts.google.com/o/oauth2/auth?client_id=563584335869-fgrhgmd47bqnekij5i8b5pr03ho849e6.apps.googleusercontent.com&scope=email%20openid%20https%3A%2F%2Fwww.googleapis.com%2Fauth%2Fcloudplatformprojects.readonly%20https%3A%2F%2Fwww.googleapis.com%2Fauth%2Ffirebase%20https%3A%2F%2Fwww.googleapis.com%2Fauth%2Fcloud-platform&response_type=code&state=443331383&redirect_uri=http%3A%2F%2Flocalhost%3A9005

Waiting for authentication...
Waiting for authentication...が表示されるとGoogleの認証画面が表示されるので好きなアドレスを使用してログインしてください。
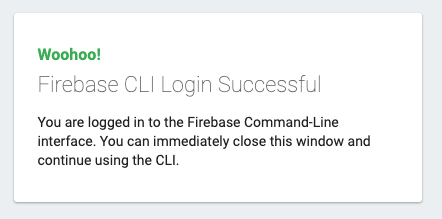
ターミナル上とブラウザ上にログインが成功したことを示すメッセージが表示されます。
ターミナル
Success! Logged in as kurukuruskt28@gmail.com
ブラウザ
Firebaseのアプリを作成
firebase initコマンドを実行します。
$ firebase init
設定は動画で紹介されているものと同じ設定です。途中でJavaScriptかTypeScriptを選択するけど今回はサンプルのファイルがTSのためTSを選択してください。
https://www.youtube.com/watch?v=DYfP-UIKxH0
こんな感じでファイルが作成されていればOKです。
念のためadminとfunctionsのバージョンを最新のものにインストールしてください。cd functionsを使用する理由ですが、最後にデプロイする時にpackage.jsonはfunctionsディレクトリのものが参照されるためです。このようにfirebaseアプリの開発ではfunctionsディレクトリに移動することが度々あるので注意してください。
$ cd functions
$ npm install firebase-admin@latest firebase-functions@latest
ローカルでデバッグする設定
firebaseはデプロイするとデバッグができませんが、ローカルでならデバッグをすることができます。以下の記事を参考にしていただければ速攻で設定できました。
Debugging Firebase Functions in VS Code
デバックの設定
// package.json
{
"scripts": {
  ...
  "build:watch": "tsc -w",
...
}
ターミナルの起動
cd functions
npm run build:watch
秘密鍵を取得
プロジェクトのApp Engine default service accountを指定して秘密鍵を作成します。好きなディレクトリに保存して絶対パスでパスを通します。
export GOOGLE_APPLICATION_CREDENTIALS=/保存したデイレクトリの絶対パス/
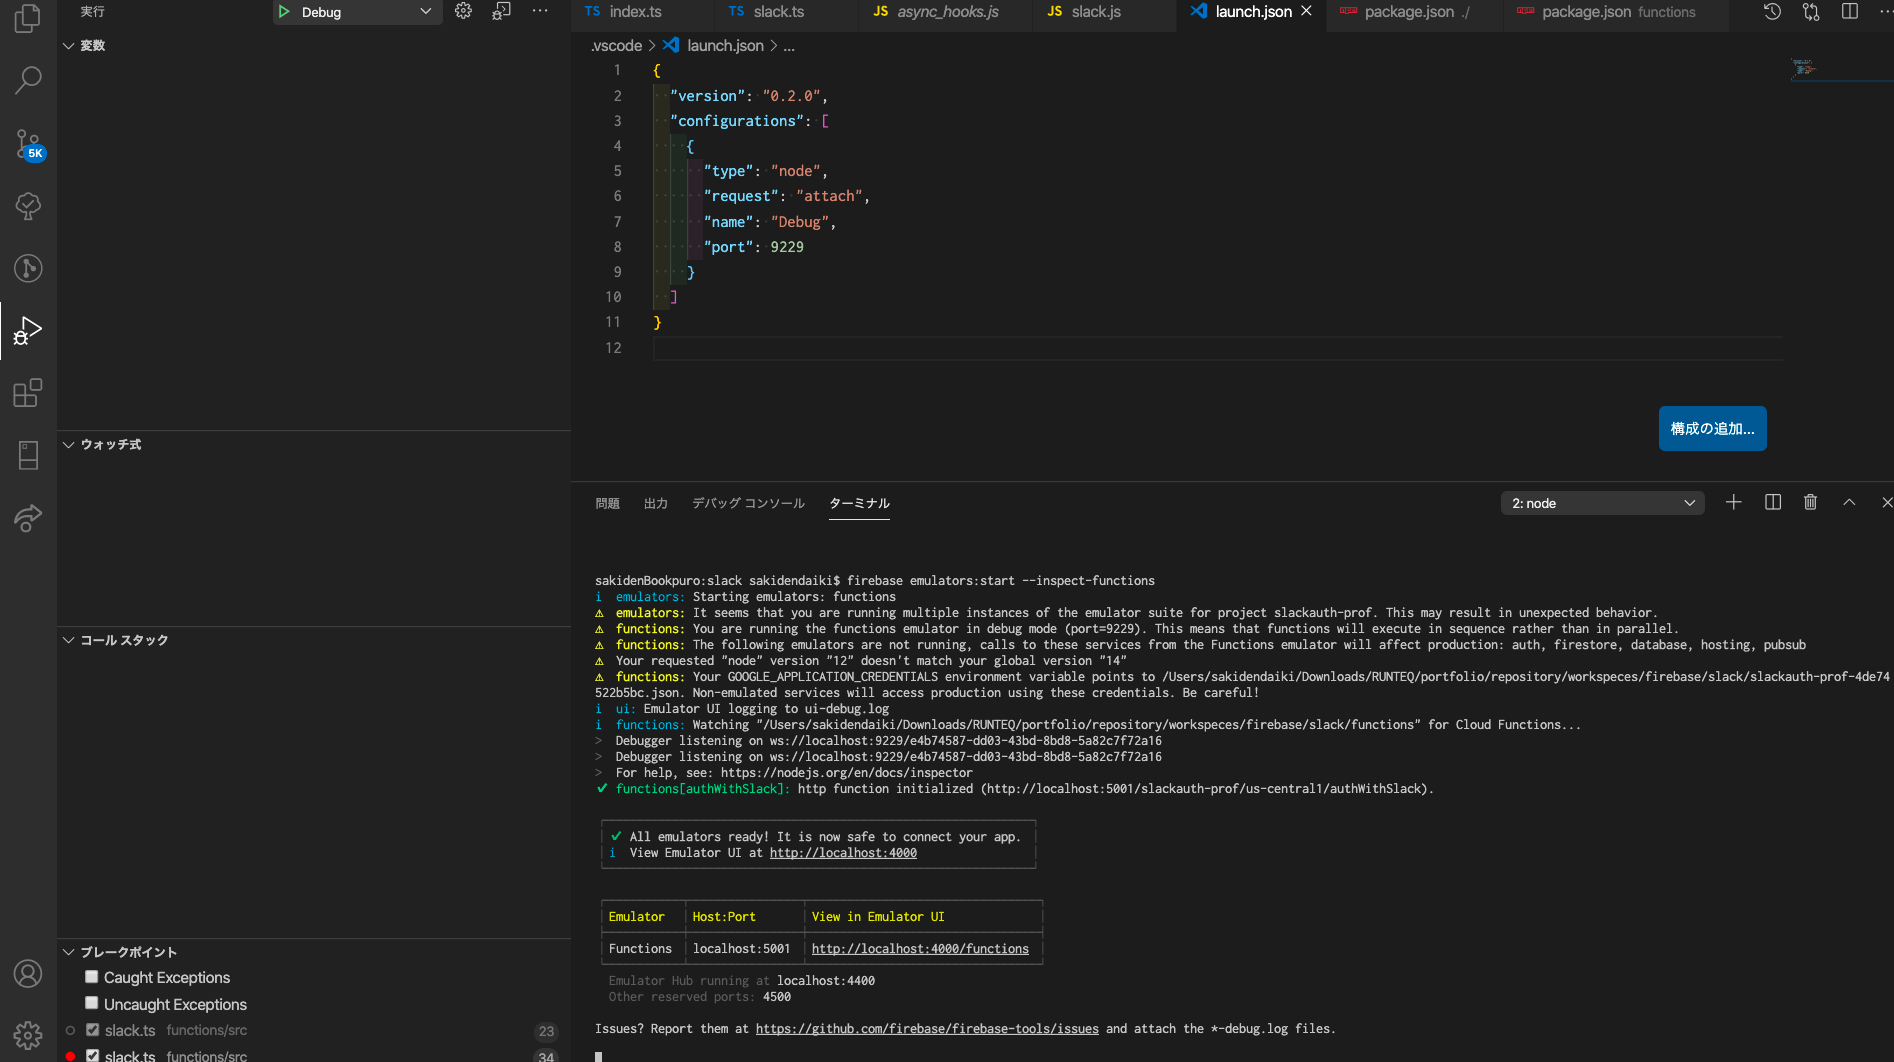
別ターミナルでfirebaseのemulatorsをinspect-functionsモードで起動します
firebase emulators:start --inspect-functions
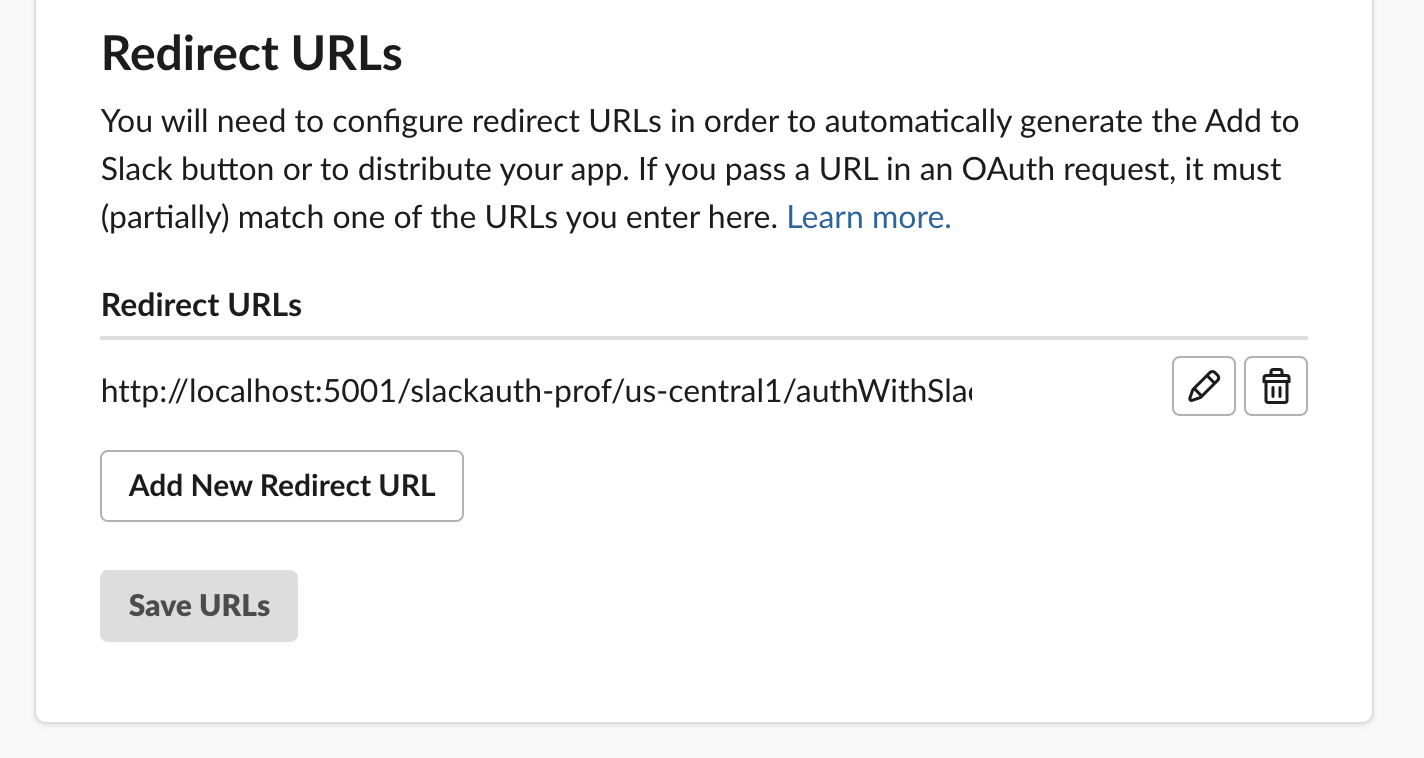
コールバックURLの指定
上記コマンド実行後、functionのURLがターミナル上に表示されているのでSlackの開発ブラウザで下記URLをコールバックURLとして指定 デフォルトでは以下のURLだと思いますが、ターミナルで確認してください。 http://localhost:5001/slackauth-prof/us-central1/authWithSlack
slackアプリ開発ページ
https://api.slack.com/apps/A01QG108VGA?created=1
vscodeのlaunch.jsonにport9229を指定してデバッグの設定ファイルを作成
{
  "version": "0.2.0",
  "configurations": [
    {
      "type": "node",
      "request": "attach",
      "name": "Debug",
      "port": 9229
    }
  ]
}
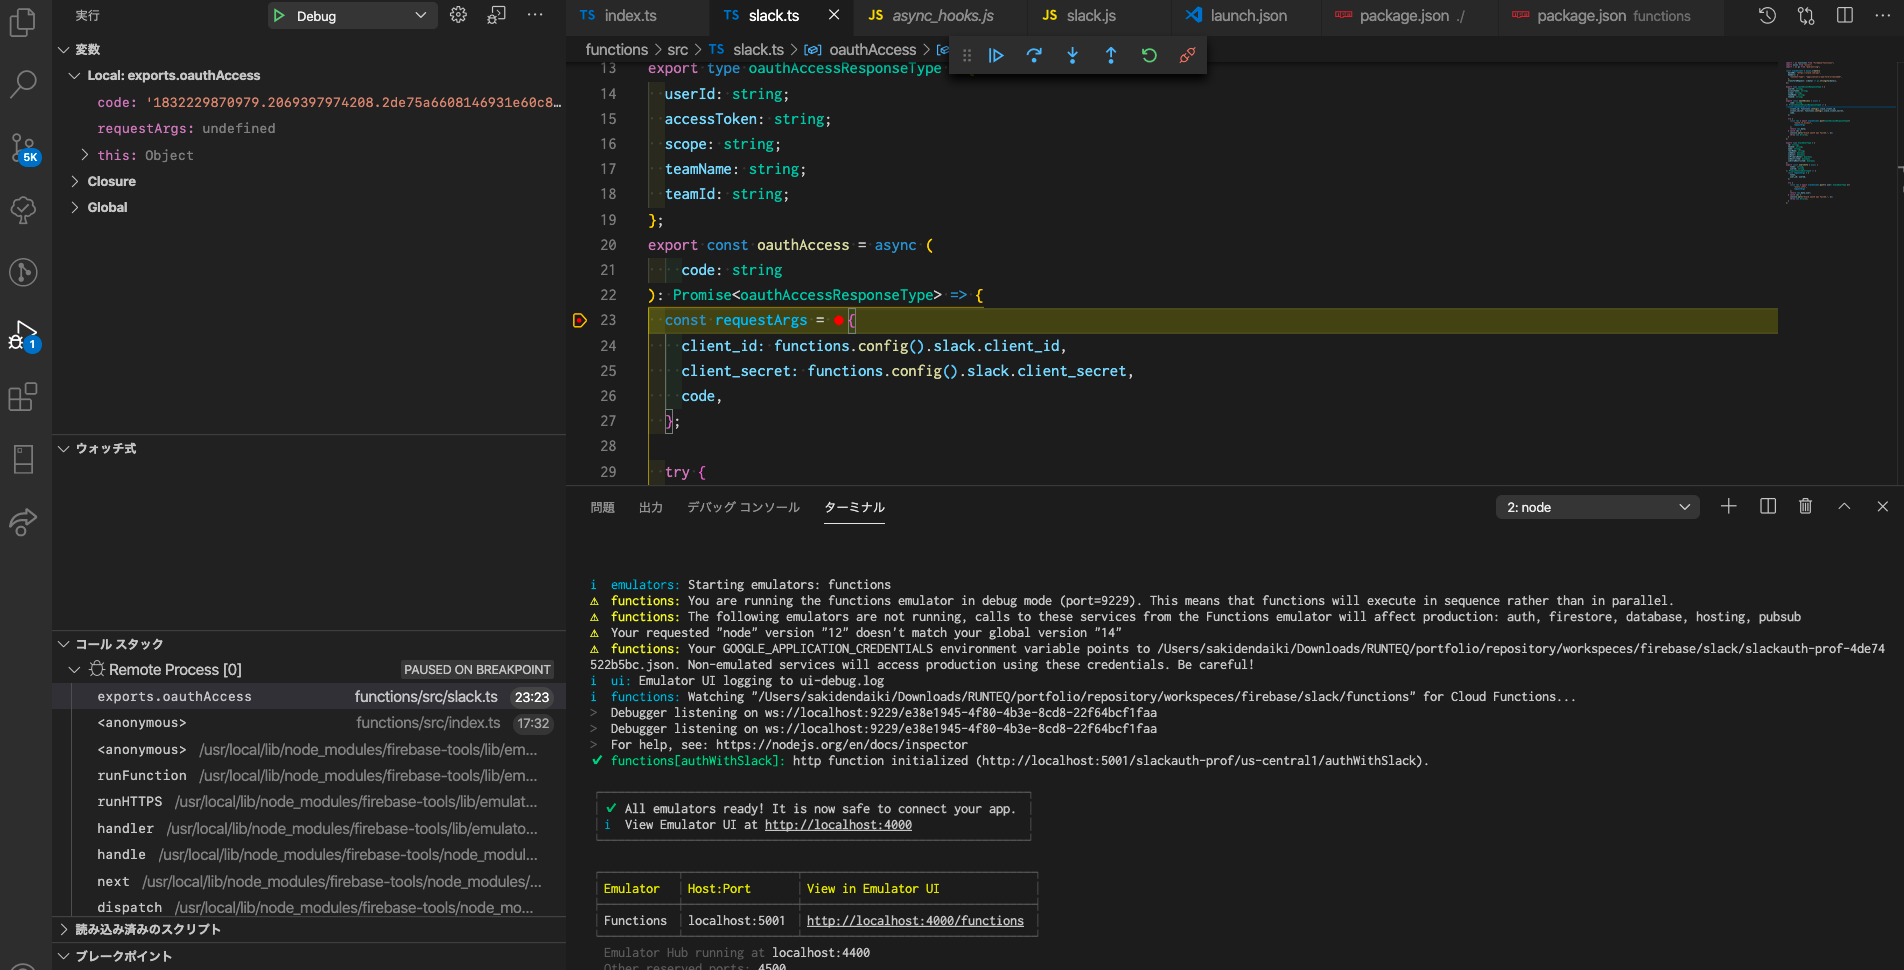
TypeScriptファイルのブレークポイントを指定
デバッグのスタートボタンを押すとDebugger attached.というメッセージが表示されたら準備完了です。れで実際にslackログインをするとデバックができるようになります。
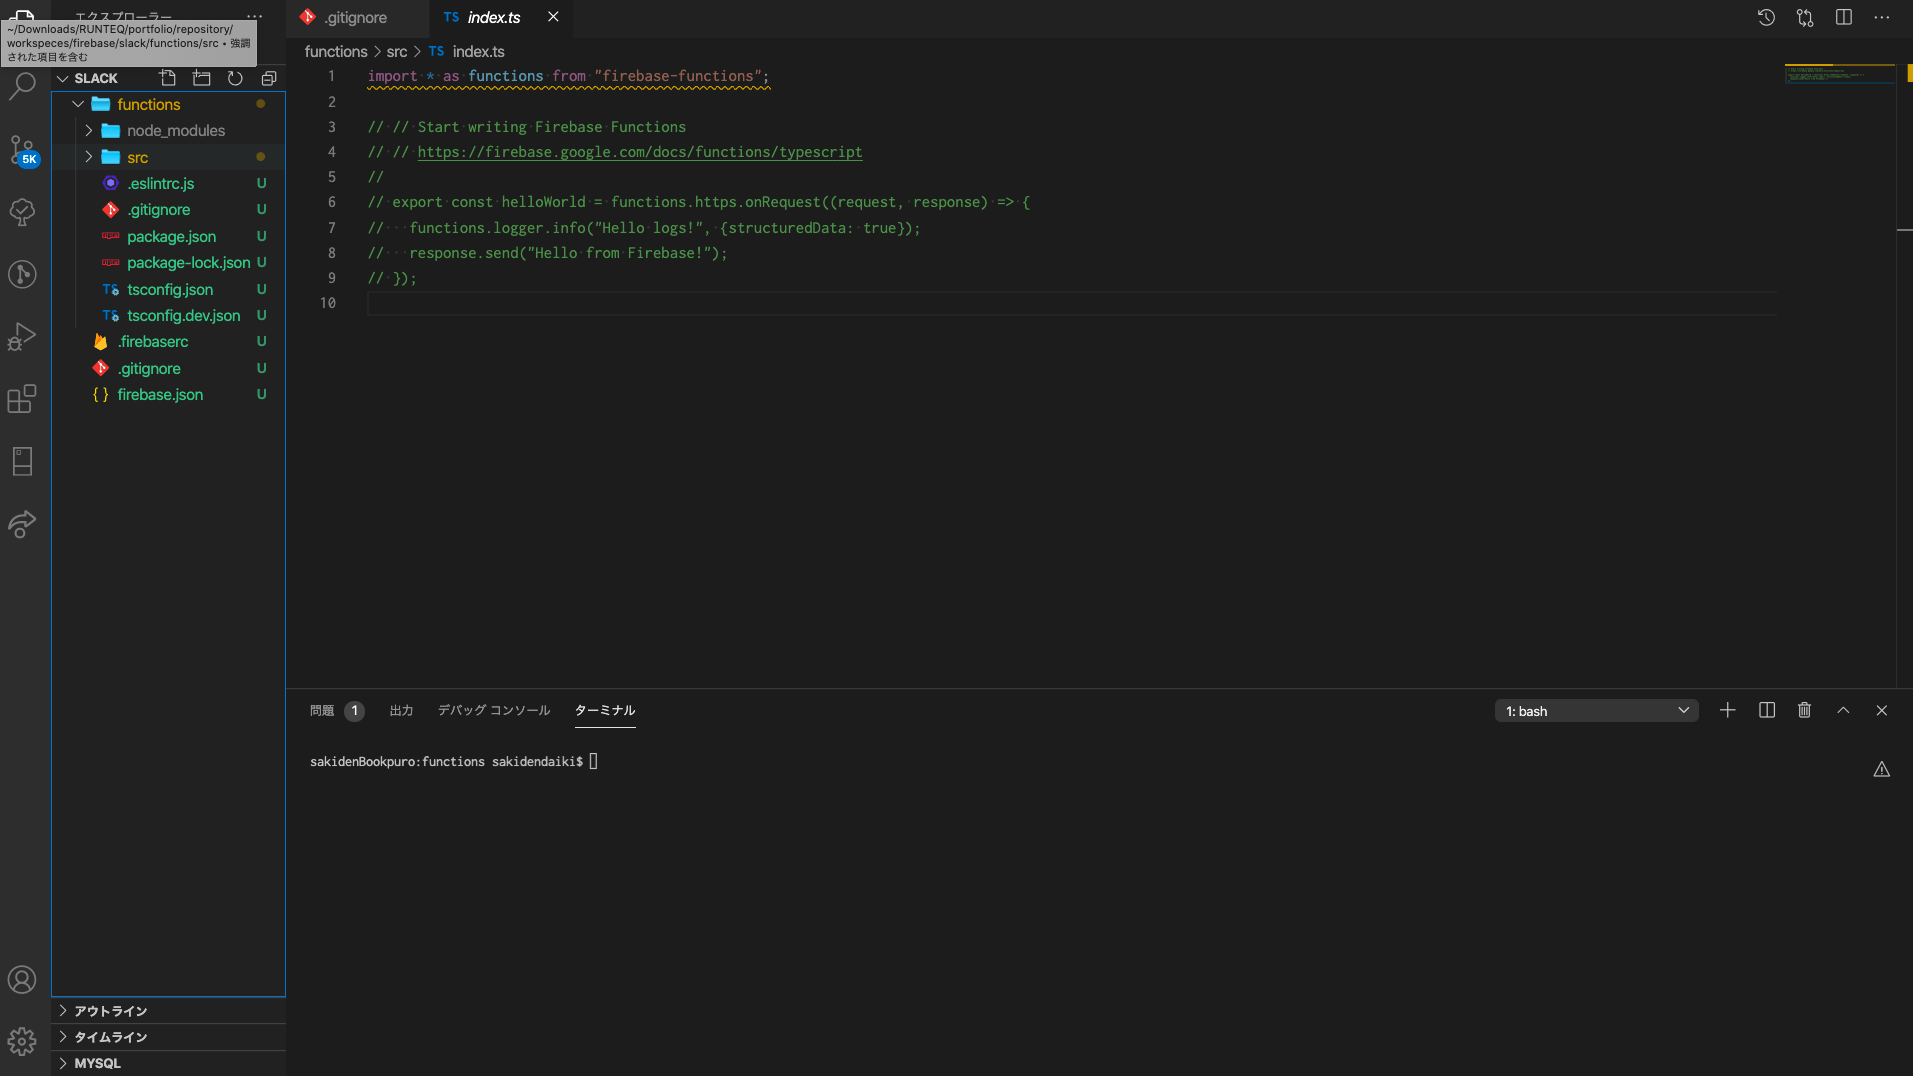
ファイルを編集
次にsrc直下のファイルを編集していきます。下記参考ファイルで大体置き換え可能だったのですが、最終コミットが2年前と古く、またリントエラーで引っかかってしまうため以下のように修正したものを配置しました。
// functions/src/index.ts
import * as functions from "firebase-functions";
import * as admin from "firebase-admin";
import {oauthAccess} from "./slack";
import {URL} from "url";

admin.initializeApp({
  serviceAccountId: "slackauth-prof@appspot.gserviceaccount.com", // GCPから確認する
  credential: admin.credential.applicationDefault(), // 必須??
});

exports.authWithSlack = functions.https.onRequest(async (req, res) => {
  const slackAuthCode = req.query.code as string;
  const redirectUri = req.query.state as string | undefined;

  if (!slackAuthCode) {
    console.warn("code query string not find.");
    res.status(400).end();
  }

  const userCredential = await oauthAccess(slackAuthCode);

  try {
    const customToken = await admin
        .auth()
        .createCustomToken(userCredential.authed_user.id); // userIdではundefinedとなるため

    if (redirectUri) {
      const url = new URL(redirectUri);
      url.search = `t=${customToken}`;
      res.redirect(303, url.toString());
    } else {
      res
          .json({
            custom_token: customToken,
          })
          .end();
    }
    return;
  } catch (e) {
    console.error("Failed to create custom token:", e);
  }
});
// functions/src/slack.ts
import * as functions from "firebase-functions";
const { WebClient } = require("@slack/web-api"); // eslint-disable-line

export type oauthAccessResponseType = {
  userId: string;
  accessToken: string;
  scope: string;
  teamName: string;
  teamId: string;
  authed_user: any; // eslint-disable-line
};
export const oauthAccess = async (
    code: string
): Promise<oauthAccessResponseType> => {
  try {
    const res = await new WebClient().oauth.v2.access({ // oauth.accessは現在非推奨
      client_id: functions.config().slack.client_id,
      client_secret: functions.config().slack.client_secret,
      code,
    });
    return res;
  } catch (e) {
    console.warn("Slack oauth was failed.", e);
    throw new Error();
  }
};
コード自体を全て説明すると長くなるので変更箇所だけ説明します。
Admin SDKの初期化
まずAdmin SDKの初期化をする箇所ですが、設定を以下のように変更しています。
admin.initializeApp();
↓
admin.initializeApp({
  serviceAccountId: "slackauth-prof@appspot.gserviceaccount.com", // GCPから確認する
  credential: admin.credential.applicationDefault(), // 必須??
});
まず、serviceAccoundIdですが公式のセットアップの箇所のものを参考にしました。
【参考コード】
admin.initializeApp({
  serviceAccountId: 'my-client-id@my-project-id.iam.gserviceaccount.com',
});
※ serviceAccountIdは秘匿情報ではないため環境変数に設定する必要はないとも上記のページで書かれています。
Firebase Admin SDKを使用するためにGoogle サービス アカウントを使用する必要があるため、それを指定してあげる必要があるそうです。serviceAccountIdはGoogle Cloud Consoleの方で確認できます。
しかし、これだけではデプロイ時になぜかうまく動作しませんでした。よくよく公式の説明を見ると、ービス アカウント ファイルと Google アプリケーションのデフォルト認証情報を組み合わせた認可方法で SDK を初期化してあげる必要があるとかいてありました。
サーバーに Firebase Admin SDK を追加する
よってアカウントを指定する設定と一緒に下記の設定も必要だと考えます。
admin.initializeApp({
  credential: admin.credential.applicationDefault(),
});
slack APIへのアクセス方法
コードを少し簡易的にしたかったことと、認証時にNode Slack SDKを使用する方法が紹介されていたため下記のように変更しました。
export const oauthAccess = async (
  code: string
): Promise<oauthAccessResponseType> => {
  const requestArgs = {
    client_id: functions.config().slack.client_id,
    client_secret: functions.config().slack.client_secret,
    code,
  };

  try {
    const res = await slackClient.post<oauthAccessResponseType>(
      "oauth.v2.access",
      requestArgs
    );
    // const res = await slackClient.post<oauthAccessResponseType>('oauth.access', requestArgs);
    return res.data;
  } catch (e) {
    console.warn("Slack oauth was failed.", e);
    throw new Error();
  }
↓
export const oauthAccess = async (
    code: string
): Promise<oauthAccessResponseType> => {
  try {
    const res = await new WebClient().oauth.v2.access({
      client_id: functions.config().slack.client_id,
      client_secret: functions.config().slack.client_secret,
      code,
    });
    return res;
  } catch (e) {
    console.warn("Slack oauth was failed.", e);
    throw new Error();
  }
};
【認証部分の紹介ページ】
これに伴い@slack/web-api @slack/events-apiをインストールしておきます。events-apiは今のところ必要ありませんが、後々アプリで使用することを想定してインストールしています。
$ npm install @slack/web-api @slack/events-api
npm WARN slack@1.0.0 No description
npm WARN slack@1.0.0 No repository field.

+ @slack/web-api@6.1.0
+ @slack/events-api@3.0.0
added 310 packages from 250 contributors and audited 310 packages in 14.521s

59 packages are looking for funding
  run `npm fund` for details
ちなみにfunctions.config()の箇所ですが、firebaseの環境変数の設定方法だそうです。
firebase functions:config:set someservice.key="THE API KEY" someservice.id="THE CLIENT ID"
上記の例を参考にslackアプリのclient_idとclient_secretを設定しましょう。
$ firebase functions:config:set slack.client_id="hogehogehoge" slack.client_secret="fugafugafugafuga"
✔  Functions config updated.

Please deploy your functions for the change to take effect by running firebase deploy --only functions
念のため環境変数が設定されているか確認してみます。 firebase functions:config:getで確認できます。
$ firebase functions:config:get
{
  "slack": {
    "client_id": "hogehogehoge",
    "client_secret": "fugafugafugafuga"
  }
}
注意として、ターミナルで設定した環境変数はデプロイ時には反映されるがローカルサーバーには反映されません。よってローカルでfunctionsを試す時には反映されないのです。
反映させるためには下記コマンドを実行します。
$ functions:config:get > .runtimeconfig.json
作成されたファイルはfunctions/配下に配置します。
Cloud Functions for Firebaseで開発を始めるときのちょっとした知見 - Qiita
上記の設定行うことでローカルでも設定した環境変数を扱うことができます。
デプロイ
EsLintを有効にしたためアップロードする前に必ずLintエラーを解決する必要がありますのでEsLintエラーを全て解決してからデプロイします。rootパスeslintのコマンドを打つとエラーになるのでfunctionsディレクトリに移動します。
$ cd functions
$ eslint src --fix
修正後デプロイします。ルートディレクトリに戻る必要があります。
$ cd ..
$ firebase deploy
デプロイ後に作成されたURLを使用してコールバックURLをslack開発用に指定します。URLはデプロイしたfirebaseプロジェクトのfunctionsに追加されているのでそこから確認できます。

Vueプロジェクトを作成
簡単なvueプロジェクトを作成します。
$ vue create sample_app
サンプルファイルを参考にvueを記述します。詳しくはサンプルファイルのReactのTSファイルをみてください。
<template>
  <div class="home">
    <img alt="Vue logo" src="../assets/logo.png" />
    <div>
      <div>
        <a :href="slackAuthUrl"
          ><img
            alt="Sign in with Slack"
            height="40"
            width="172"
            src="https://platform.slack-edge.com/img/sign_in_with_slack.png"
            srcset="
              https://platform.slack-edge.com/img/sign_in_with_slack.png    1x,
              https://platform.slack-edge.com/img/sign_in_with_slack@2x.png 2x
            "
        /></a>
      </div>
    </div>
    <HelloWorld msg="Welcome to Your Vue.js App" />
  </div>
</template>

<script>
import firebase from "firebase";
import HelloWorld from "@/components/HelloWorld.vue";

export default {
  name: "Home",
  components: {
    HelloWorld,
  },
  data() {
    return {
      slackAuthUrl: `https://slack.com/oauth/v2/authorize?user_scope=identity.basic&client_id=${process.env.VUE_APP_SLACK_CLIENT_ID}&state=${window.location.href}`,
      user: {},
    };
  },
  mounted() {
    (async () => {
      const queryPrams = new URLSearchParams(window.location.search);
      const token = queryPrams.get("t");

      if (token) {
        window.history.replaceState(
          undefined,
          window.document.title,
          window.location.href.replace(window.location.search, "")
        );
        await firebase
          .auth()
          .signInWithCustomToken(token)
          .catch((error) => {
            var errorCode = error.code;
            var errorMessage = error.message;
            console.log(errorCode);
            console.log(errorMessage);
          });
      }

      await firebase.auth().onAuthStateChanged((user) => {
        if (user) {
          this.user = user;
        } else {
          this.user = {};
        }
      });
    })();
  },
  methods: {
    hundleSignOut() {
      firebase
        .auth()
        .signOut()
        .then(function () {
          console.log("sign out successful");
        })
        .catch(function (error) {
          console.log(error);
        });
    },
  },
};
</script>
一つ説明するのならばボタンのHTML作成ですね。
<div>
  <a :href="slackAuthUrl"
    ><img
      alt="Sign in with Slack"
      height="40"
      width="172"
      src="https://platform.slack-edge.com/img/sign_in_with_slack.png"
      srcset="
        https://platform.slack-edge.com/img/sign_in_with_slack.png    1x,
        https://platform.slack-edge.com/img/sign_in_with_slack@2x.png 2x
      "
  /></a>
</div>
slackAuthUrl: `https://slack.com/oauth/v2/authorize?user_scope=identity.basic&client_id=${process.env.VUE_APP_SLACK_CLIENT_ID}&state=${window.location.href}`,
Slackアプリを作っているのであれば以下のページからボタンを作成することができます。client_idは環境変数に入れてください。
これで全ての準備は整いました!しかし!
アクセスすると以下のようなエラーが表示されました。
Identity and Access Management (IAM) API has not been used in project
1234567890 before or it is disabled. Enable it by visiting
https://console.developers.google.com/apis/api/iam.googleapis.com/overview?project=1234567890
then retry. If you enabled this API recently, wait a few minutes for the action
to propagate to our systems and retry.
すごくテンションが下がりましたが、対応方法としてはGCP上でAPI を有効にすることで解決するようです。Googleのドキュメント優秀すぎる、、!
これでログインできました!!見た目はただ戻ってきているだけですが、コンソールで値が戻ってきていることは確認済みです!
【Firebase】Sign in with Slackの実装方法(設計)
はじめに
こんにちは!大ちゃんの駆け出し技術ブログです。
Firebaseを用いたsign in with slackができるまでの記録第二弾として、今日は昨日1日調べてわかったことをこの記事に残しておきたいと思います。記事内容としてはあくまで設計段階ですので、実際に試してみてからまた更新します。
Firebase Authentication
Firebaseの認証部分だけを使用するために「Firebase Authentication」を使用します。この機能を使うことで認証機能をかなり簡単に実装できるようです。例えば、自分が試した以下の記事は30分程度でTwitter認証を行うことができました。
Vue、FirebaseでツイッターのOAuthを使ったログイン機能を追加する - Qiita
【該当ソースコード】
<template>
  <div class="signin">
    <h2>Sign in</h2>
    <button @click="signin">Signin</button>
  </div>
</template>

<script>
import firebase from 'firebase'

export default {
  name: 'Signin',
  methods: {
    signin: function () {
      const provider = new firebase.auth.TwitterAuthProvider()
      firebase.auth().signInWithPopup(provider)
        .then(
          result => {
            if (user) {
              console.log(result.user)
            } else {
              alert('有効なアカウントではありません')
            }
          })
    }
  }
}
</script>
Firebaseを通して認証を行うソースコードは以下の部分です。
const provider = new firebase.auth.TwitterAuthProvider()
firebase.auth().signInWithPopup(provider)
Twitter認証のためのメソッドとしてTwitterAuthProviderというものが用意されています。よって、slack認証のためにはSlackAuthProviderを使えばいいのだなと思ったのですが、そううまくいきませんでした。slack認証はFirebaseのプロバイダとしては登録されていないからです。
【Authenticationの画面キャプチャ】
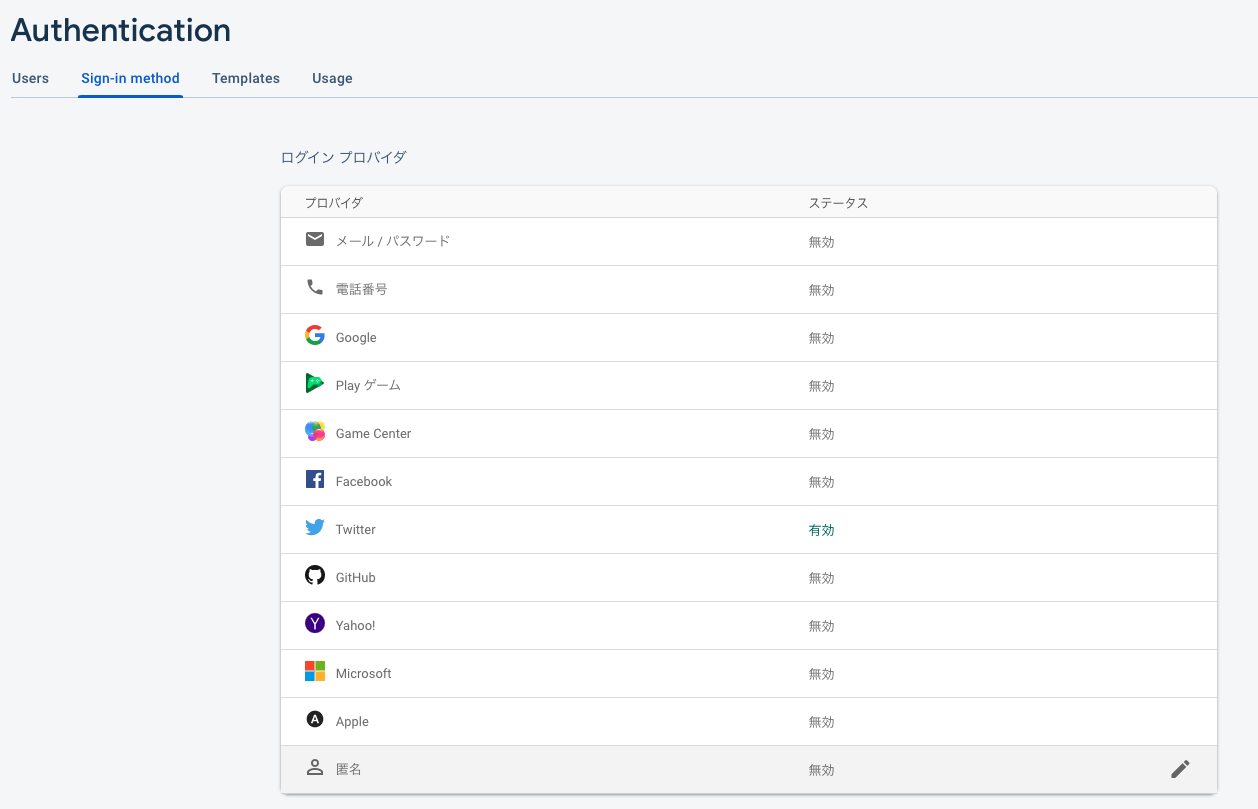
ではslack認証はFirebaseに非対応なのかというと実はそうではないようです。以下の公式の記事の例でもある通り、カスタム認証システムを使用してslack認証を行うようです。
Android でカスタム認証システムを使用して Firebase 認証を行う
Slack認証フロー
カスタム認証システムを使用する上で重要なのは各APIの認証フローに沿って自作で認証フローを作ることです。slack認証フローでは公式では以下のように記載されています。

Token negotiation flow
- User arrives at your site and clicks Sign in with Slack button
- User arrives at
slack.com/oauth/v2/authorize?client_id=CLIENT_ID&user_scope=identity.basicand briefly approves sign in - User arrives at your specified redirect URL with a
codeparameter - Your server exchanges
codefor an access token usingslack.com/api/oauth.v2.access - Your server uses the resultant access token to request user & workspace details with
slack.com/api/users.identity, passing the awarded token as a HTTP authorization header or POST parameter
ユーザーがアプリケーション(自分のアプリ)に対して認証を行い、その後slack APIにAccess Tokenを発行してもらい、それを利用してリソースにアクセスするというフローです。これは至ってシンプルな認証フローだと思います。不明点がある方は以下の記事を参考にしていただければと思います。
上記のフローをアプリケーション上ではなくFirebase上で行う実装に置き換える必要があります。参考になる記事がありましたのでそれをそのまま使用して説明しようかと思います。
Sign in with Slack x Firebase Authenticationやってみた話 - Qiita
【Firebase版slack認証フロー】
- クライアントからSlackの認証ページへ飛ぶ
- ユーザーはSlackの画面でアクセス許可を行う
- Slackは認証用codeを載せて指定しておいたリダイレクト先に飛ぶ(今回は
Cloud Functionsを利用) - codeを使ってSlackユーザーのアクセストークンを取得、必要なら永続化などを行う
- FirebaseのAdmin SDKを使ってトークンを発行する
- トークンを載せてクライアントにリダイレクト
- クライアントは
signInWithCustomTokenメソッドを叩く
上の図と公式の図は同じことをしています。
=(イコール)
みたいですね。
参考にしてFirebase認証をまとめてみました。
1. クライアントからSlackの認証ページへ飛ぶ
(User arrives at your site and clicks Sign in with Slack button)
これは自分のアプリケーションやサイト画面にslack認証ページに飛ぶためのボタンやリンクを設けてあげるだけです。Slack Appを作成後、Sign in with SlackのページにあるBotton Generatorを使用すれば簡単に認証ページに飛ぶことができるボタンを作成できます。
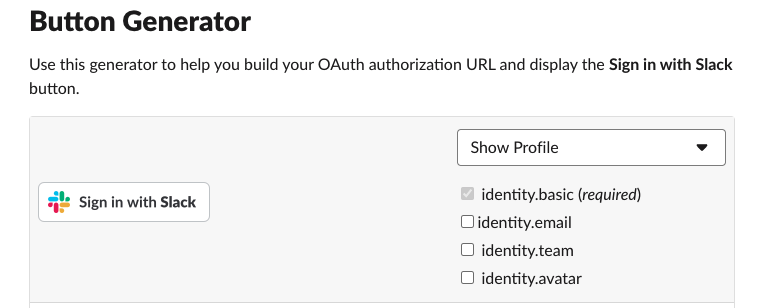
ボタンのコードの例
<a href="https://slack.com/oauth/v2/authorize?user_scope=identity.basic&client_id=<アプリのクライアントID>"><img alt=""Sign in with Slack"" height="40" width="172" src="https://platform.slack-edge.com/img/sign_in_with_slack.png" srcset="https://platform.slack-edge.com/img/sign_in_with_slack.png 1x, https://platform.slack-edge.com/img/sign_in_with_slack@2x.png 2x" /></a>
ボタン生成ページ
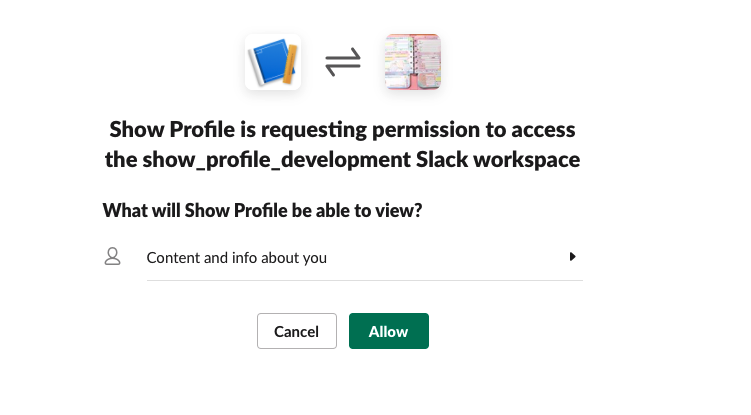
2. ユーザーはSlackの画面でアクセス許可を行う
(User arrives at slack.com/oauth/v2/authorize?client_id=CLIENT_ID&user_scope=identity.basic and briefly approves sign in)
slack上の認証画面でアクセス許可を行うフローです。上記のボタンを生成していれば問題なく認証画面に遷移すると思います。
【認証画面】
3. Slackは認証用codeを載せて指定しておいたリダイレクト先に飛ぶ(今回はCloud Functionsを利用)
(User arrives at your specified redirect URL with a code parameter)
ここはFirebaseの初学者の自分には理解するのに苦労しました。参考記事に書いてあることとしては以下になります。
- ユーザーが許可を行うと、指定しておいたリダイレクト先に飛ぶフロー
- ここだけ唯一サーバーサイドが必要となるので
Firebase Cloud Functionsを利用 - その際に
codeというクエリパラメータで認証用の一時的なトークンを渡してくる
認証画面では認証後コールバック先にリダイレクトするようになっています。本来であれば自分のアプリケーションにリダイレクトするフローですが、それをFirebaseにリダイレクトするようにしています。Firebaseにリダイレクトさせるために使用するのが、Firebase Cloud Functionsというサーバーサイドの機能です。Javascript、またはTypeScriptをFirebase上にデプロイしておくことで、リダイレクトした時の処理、ロジックをFirebase上で行えるようにします。また、リダイレクト先のパラメータにcodeというクエリパラメータで認証用の一時的なトークンを渡してくれます。
デプロイ方法
Getting Started with Cloud Functions for Firebase using TypeScript - Firecasts
4. codeを使ってSlackユーザーのアクセストークンを取得、必要なら永続化などを行う
(Your server exchanges code for an access token using slack.com/api/oauth.v2.access)
先ほどのcodeを使ってoauth.v2.accessというエンドポイントへリクエストを投げ、アクセストークンを取得します。そのロジックをFirebase Cloud Functionsをデプロイして実装します。参考記事でTypeScriptのファイルが公開されていたのでこれをありがたく使わせてもらおうと思います。
※こちらの公開ファイルの最終更新日は2年前ですので更新する必要があります。例えば以下の部分。
const res = await slackClient.post<oauthAccessResponseType>('oauth.v2.access', requestArgs);
// const res = await slackClient.post<oauthAccessResponseType>('oauth.access', requestArgs);
⇒ Firebaseからslackにアクセストークンのリクエストを送るフェーズ(仮実装)
import * as functions from 'firebase-functions';
import axios from 'axios';
import * as qs from 'querystring';

// 全体的に例外処理が果てしなくてきとう。
// というか、SlackAPIはok: falseがエラーの際には返ってくるのでこれでは例外処理になってないような気がする。
// 細かいことは気にしない。

const slackClient = axios.create({
  baseURL: 'https://slack.com/api',
  headers: {
    'Content-Type': 'application/x-www-form-urlencoded',
  },
  transformRequest: [
    data => qs.stringify(data)
  ]
})

export type oauthAccessResponseType = {
  user_id: string;
  access_token: string;
  scope: string;
  team_name: string;
  team_id: string;
}
export const oauthAccess = async (code: string): Promise<oauthAccessResponseType> => {
  const requestArgs = {
    client_id: functions.config().slack.client_id,
    client_secret: functions.config().slack.client_secret,
    code
  };

  try {
    const res = await slackClient.post<oauthAccessResponseType>('oauth.v2.access', requestArgs);
    // const res = await slackClient.post<oauthAccessResponseType>('oauth.access', requestArgs);
    return res.data;
  } catch(e) {
    console.warn('Slack oauth was failed.', e);
    throw new Error();
  }
}

// 面倒なので使いそうなやつだけ
export type SlackUserType = {
  id: string;
  team_id: string;
  name: string;
  real_name: string;
  is_admin: boolean;
  is_owner: boolean;
  is_primary_owner: boolean;
  is_restricted: boolean;
  is_ultra_restricted: boolean;
};
export const usersInfo = async (token: string, userId: string) => {
  const requestArgs = {
    token,
    user_id: userId
  };

  try {
    const res = await slackClient.post<{user: SlackUserType}>('users.info', requestArgs);
    return res.data.user;
  } catch (e) {
    console.warn('Slack oauth was failed.', e);
    throw new Error();
  }
};
これによりアクセストークンをSlack APIから取得することができます。
5. FirebaseのAdmin SDKを使ってトークンを発行する
アクセストークン取得後Firebaseに再度リダイレクトされるため、クライアント側にカスタムトークンを発行するフローが必要になります。これもFirebase Cloud Functionsを使用して実装します。つまり、Firebase認証フローでは合計で2つのファイルをデプロイします。
トークンの発行方法としては公式の通りにcreateCustomTokenメソッドを使用します。
const customToken = await admin.auth().createCustomToken(userCredential.user_id);
6. トークンを載せてクライアントにリダイレクト
customTokenをユーザーに返すフローです。ようやくここでユーザー側に戻ってきました。
if (redirectUri) {
      const url = new URL(redirectUri);
      url.search = `t=${customToken}`;
      res.redirect(303, url.toString());
    } else {
      res.json({
        custom_token: customToken
      }).end();
    }
    return;
  } catch (e) {
    console.error('Failed to create custom token:', e)
  }
});
7. クライアントはsignInWithCustomTokenメソッドを叩く
(Your server uses the resultant access token to request user & workspace details with slack.com/api/users.identity, passing the awarded token as a HTTP authorization header or POST parameter)
取得したカスタムトークンを使用してsignInWithCustomTokenを叩くことでAPIリソースにアクセスすることができるようになります。
firebase.auth().signInWithCustomToken(token)
【カスタム認証の該当ソースコード】
終わりに
まだ上記フローを直接試していないので近日中に試してみます。
【Firebase】ブラウザからの始め方
はじめに
こんにちは!大ちゃんの駆け出し技術ブログです。 Omniauthを使用したslack認証がどうしてもうまくいかず、Firebaseを使用して認証機能を実装することになりました。そのため、Firebaseの使い方について少しずつアウトプットして行こうかなと思います。今回ははじめ方としてブラウザ上でのFirebaseの始め方について記載しておきます。
Firebaseの設定
認証機能を担うFirebaseの設定を想定します。
使ってみるを押してください。するとプロジェクト作成画面に遷移するかと思います。
https://i.gyazo.com/f7e1ed332087a528232a471400eff323
そしたら適当にプロジェクトを作成してみてください。自分の場合、プロジェクト名は「practice01」。Google アナリティクスはoffにしました。
作成すると、以下の画面に遷移できるかと思います。この画面からプロジェクトのいろいろな設定を行っていきます。

今回は認証機能を追加していくので、Firebase Authenticationを使用します。
「始める」をクリックします。すると以下のようにログインプロバイダ一覧が表示されます。
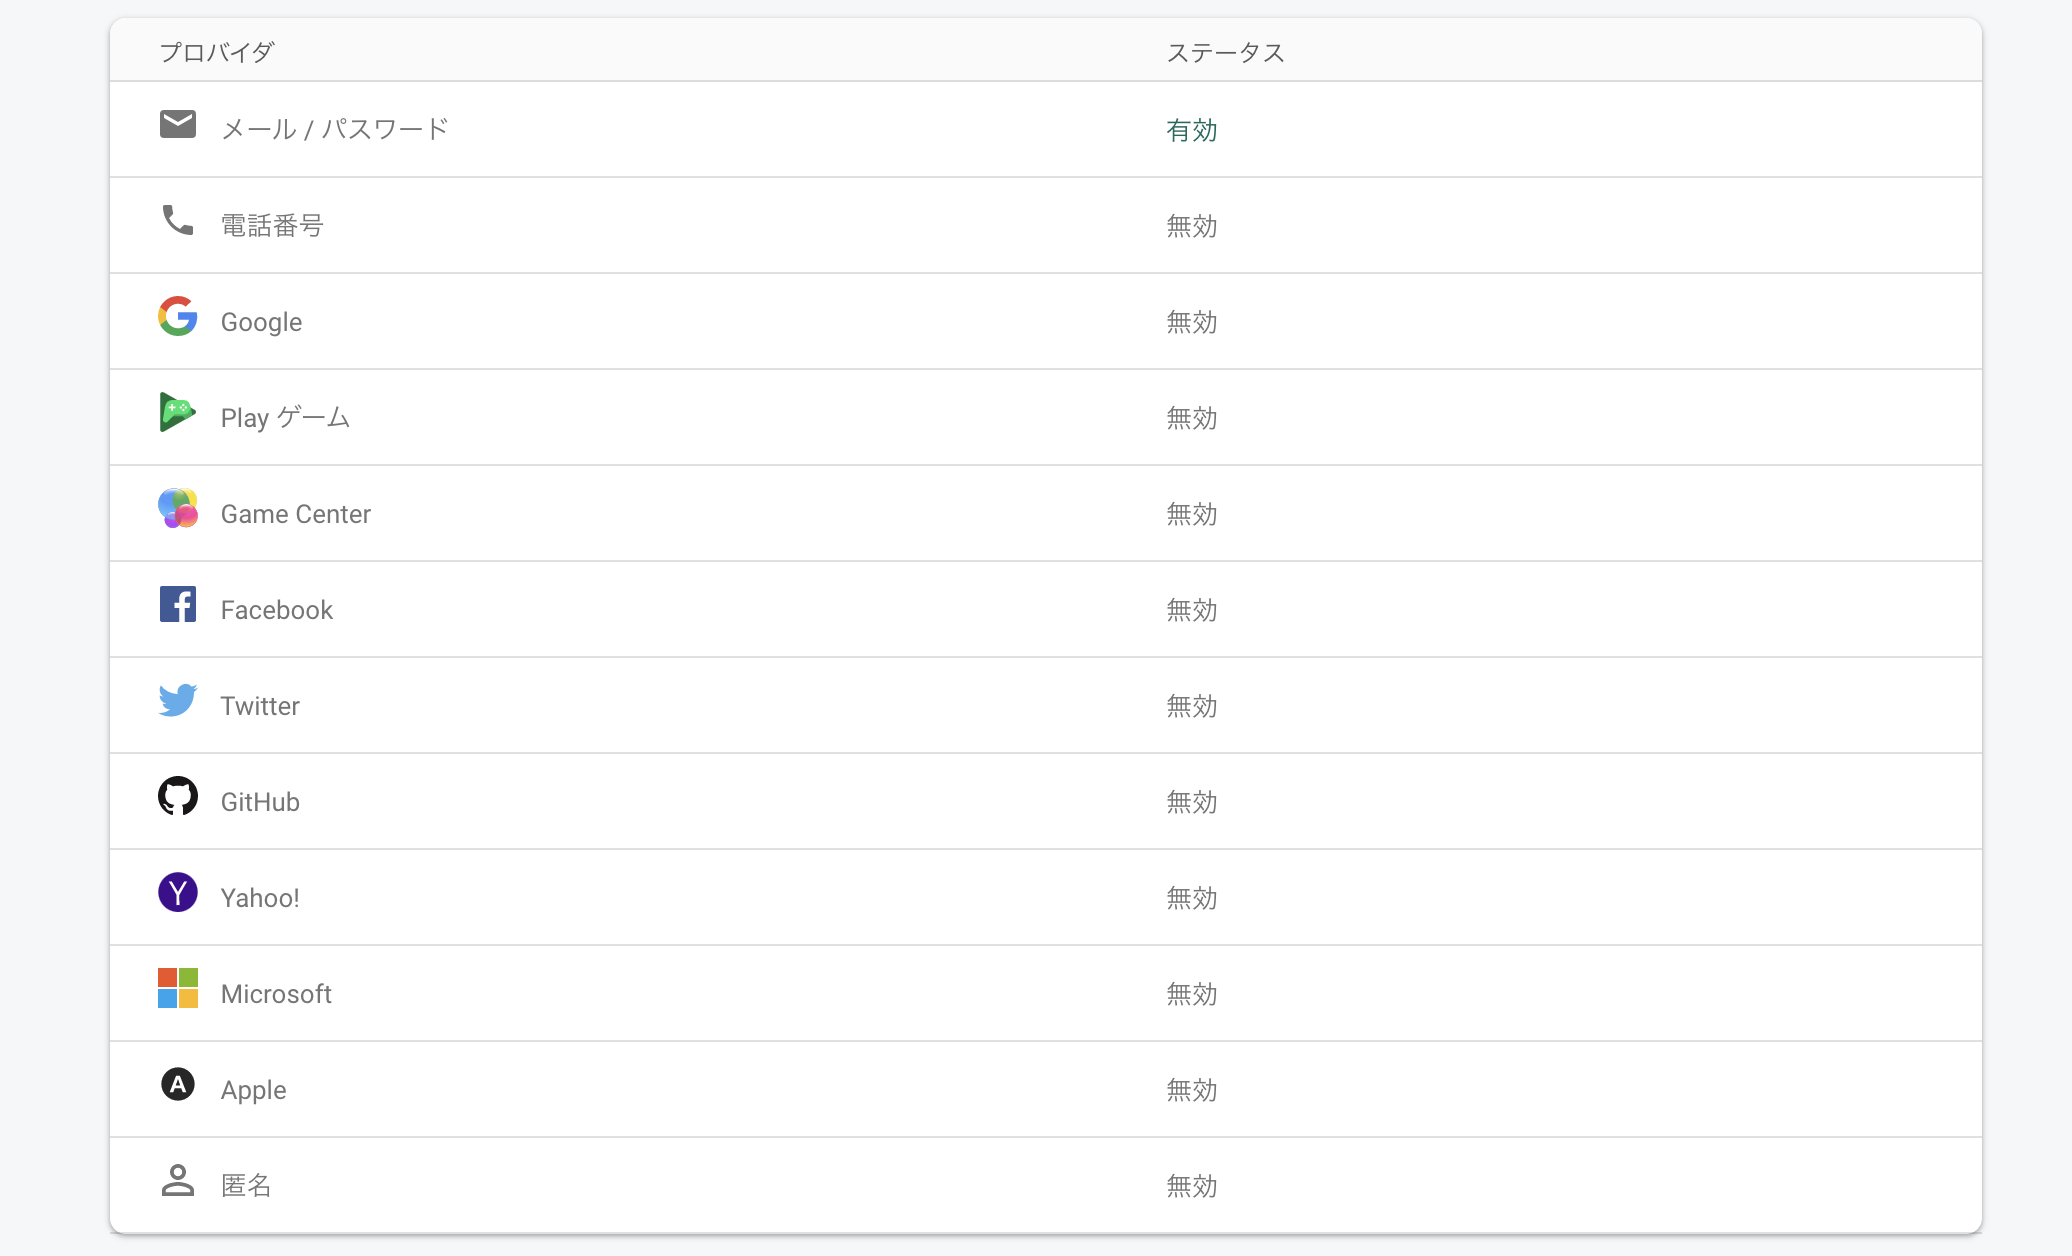
自分が今後使うであろうslackはないのが少々残念と思いました(slackについてはできると思うので今後挙げていきたいと思います。)
プロバイダ一覧にマウスを合わせると編集ボタンが表示されるはずです。今回は「メール/パスワード」を編集し、無効になっているステータスを有効にしてください。
【Vue】【Rails】selectタグのv-modelとActive Hashの更新
はじめに
こんにちは!大ちゃんの駆け出し技術ブログです。
Active Hashを使用して出身地を登録するフォームを作っていたのですが、そこで少しつまずいたので備忘録として残しておきます。
つまづいた箇所
以下のようにActive Hashを使用して県名を登録しています。
class Prefecture < ActiveHash::Base
  self.data = [
    { id: 1, name: '北海道' }, { id: 2, name: '青森県' }, { id: 3, name: '岩手県' },
    { id: 4, name: '宮城県' }, { id: 5, name: '秋田県' }, { id: 6, name: '山形県' },
    { id: 7, name: '福島県' }, { id: 8, name: '茨城県' }, { id: 9, name: '栃木県' },
    { id: 10, name: '群馬県' }, { id: 11, name: '埼玉県' }, { id: 12, name: '千葉県' },
    { id: 13, name: '東京都' }, { id: 14, name: '神奈川県' }, { id: 15, name: '新潟県' },
    { id: 16, name: '富山県' }, { id: 17, name: '石川県' }, { id: 18, name: '福井県' },
    { id: 19, name: '山梨県' }, { id: 20, name: '長野県' }, { id: 21, name: '岐阜県' },
    { id: 22, name: '静岡県' }, { id: 23, name: '愛知県' }, { id: 24, name: '三重県' },
    { id: 25, name: '滋賀県' }, { id: 26, name: '京都府' }, { id: 27, name: '大阪府' },
    { id: 28, name: '兵庫県' }, { id: 29, name: '奈良県' }, { id: 30, name: '和歌山県' },
    { id: 31, name: '鳥取県' }, { id: 32, name: '島根県' }, { id: 33, name: '岡山県' },
    { id: 34, name: '広島県' }, { id: 35, name: '山口県' }, { id: 36, name: '徳島県' },
    { id: 37, name: '香川県' }, { id: 38, name: '愛媛県' }, { id: 39, name: '高知県' },
    { id: 40, name: '福岡県' }, { id: 41, name: '佐賀県' }, { id: 42, name: '長崎県' },
    { id: 43, name: '熊本県' }, { id: 44, name: '大分県' }, { id: 45, name: '宮崎県' },
    { id: 46, name: '鹿児島県' }, { id: 47, name: '沖縄県' }
  ]
end
コントローラーはprefecture_idをパラメーターとして受け取り登録しています。
def create
  @profile = current_user.build_profile(profile_params)

  if @profile.save
    render json: @profile
  else
    render json: @profile.errors, status: :bad_request
  end
end

private

def profile_params
  params.require(:profile).permit(:height, :gender, :blood_type, :prefecture_id)
end
ここで、フロント側に渡すJSONの値として、prefecture_idをそのまま渡してしまうと、Active Hashで定義しているidが返ります。例えば、北海道ならprefecture_idが1と返ってきます。フロント側では県名を表示したいので、ActiveModelSerializersを使用して、prefecture.nameとすることで県名の値(idが1なら北海道)を返却します。
# app/serializers/profile_serializer.rb
class ProfileSerializer < ActiveModel::Serializer
  attributes :id,:height, :gender, :blood_type, :prefecture_id
  belongs_to :user

  def prefecture_id
    object.prefecture.name
  end
end
このActiveModelSerializersの箇所は過去記事で説明しているのでよければ参照ください。
さて、詰まった箇所は以下の部分です。
県名の編集のためにvue側でも同じようにprefecturesで定義し、それを<template>タグ内で繰り返し処理でoptionに展開していました。
data() {
    return {
      prefectures: [
        { text: "北海道", value: "1" },
        { text: "青森県", value: "2" },
        { text: "岩手県", value: "3" },
        { text: "宮城県", value: "4" },
        { text: "秋田県", value: "5" },
        { text: "山形県", value: "6" },
        { text: "福島県", value: "7" },
        { text: "茨城県", value: "8" },
        { text: "栃木県", value: "9" },
        { text: "群馬県", value: "10" },
        { text: "埼玉県", value: "11" },
        { text: "千葉県", value: "12" },
        { text: "東京都", value: "13" },
        { text: "神奈川県", value: "14" },
        { text: "新潟県", value: "15" },
        { text: "富山県", value: "16" },
        { text: "石川県", value: "17" },
        { text: "福井県", value: "18" },
        { text: "山梨県", value: "19" },
        { text: "長野県", value: "20" },
        { text: "岐阜県", value: "21" },
        { text: "静岡県", value: "22" },
        { text: "愛知県", value: "23" },
        { text: "三重県", value: "24" },
        { text: "滋賀県", value: "25" },
        { text: "京都府", value: "26" },
        { text: "大阪府", value: "27" },
        { text: "兵庫県", value: "28" },
        { text: "奈良県", value: "29" },
        { text: "和歌山県", value: "30" },
        { text: "鳥取県", value: "31" },
        { text: "島根県", value: "32" },
        { text: "岡山県", value: "33" },
        { text: "広島県", value: "34" },
        { text: "山口県", value: "35" },
        { text: "徳島県", value: "36" },
        { text: "香川県", value: "37" },
        { text: "愛媛県", value: "38" },
        { text: "高知県", value: "39" },
        { text: "福岡県", value: "40" },
        { text: "佐賀県", value: "41" },
        { text: "長崎県", value: "42" },
        { text: "熊本県", value: "43" },
        { text: "大分県", value: "44" },
        { text: "宮崎県", value: "45" },
        { text: "鹿児島県", value: "46" },
        { text: "沖縄県", value: "47" },
      ],
<template>タグ内で繰り返し処理で展開
<select
  v-model="editProfile.prefecture_id"
  name="profile[prefecture_id]"
>
  <option
    v-for="prefecture in prefectures"
    :key="prefecture.value"
    :value="prefecture.value"
  >
    {{ prefecture.text }}
  </option>
</select>
:value="prefecture.value"とすることでサーバー側に渡すパラメータはidで渡すようにしています。これはActive Hashで更新するためのパラメータがidであるためです。
※この部分については少し冗長かなと思ったので、のちほど改善したいと思っています。例えば、Active Hashで登録している値をAPIレスポンスで受け取りそれをフロント側で表示することで、サーバー側のActive Hashの値とフロント側の値を同じにすることができます。今だと、フロント側とサーバー側で別々で県名を指定しているので冗長かなと思います。
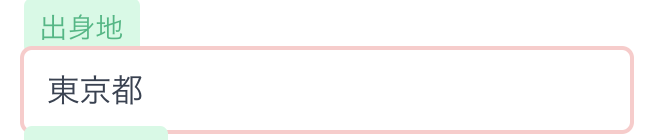
ここで問題となったのがv-modelの値はoptionの中のvalueと一致しないと編集画面を表示したときに、何も選択されていない状態で表示されてしまうことです。

editProfile.prefecture_idは上述したように県名を表示するために、値はidではなく県名となっています。しかし、selectタグ内ではvalueはidとなっているために県名がどのoptionのvalueにも当てはまらない状態です。そのため、editProfile.prefecture_idには値が格納されていますが、図のようにフォームに何も選択されていないような状態で表示されてしまうのです。
解決策
ベストプラクティスかは不明なのですが、optionのvalueを県名と一致させる方法を取りました。つまり、:value="prefecture.text"とすることで、valueが県名になるようにしました。
<option
  v-for="prefecture in prefectures"
  :key="prefecture.value"
  :value="prefecture.text"
>
  {{ prefecture.text }}
</option>
これで編集画面を開いたときに、valueとv-modelの値が一致するために初期状態で値が選択されているようになります。
しかし、これだとサーバー側で受け取るパラメーターとしてはidではなく県名になってしまい、正常に値を更新できなくなってしまいます。そこで、更新するときにパラメータを変更するようにしました。
const selectedPrefecture = this.prefectures.find(
  (prefecture) => prefecture.text == editBasicProfile.prefecture_id
);
editBasicProfile.prefecture_id = selectedPrefecture.value;
dataで登録している県名の中からパラメーターとして渡っているeditBasicProfile.prefecture_idと一致する県名のオブジェクトを取得します。そして、そのオブジェクトに格納されているvalue(id)を代入することで値をidに無理やり変更しています。
これにより無事値を更新することができました!
【Rails】【Vue】Form Objectとの連携
はじめに
こんにちは!大ちゃんの駆け出し技術ブログです。
PF制作で使用したVueからForm Objectを使用した連携方法について記事が少なかったのでここに記事として残しておこうと思いました。
PF制作では以下のようなカードを実装したいと思いました。1つのカードにタイトルみたいなものがあり、その中に質問と回答が複数ある構成です。
まず必要な設計としてはquestion_blockみたいなモデルがあり、そしてその中にquestion_itemsが3つまであるという関係です。
DBに表すと以下のようになります。

そのため、一度のフォーム入力で上記のカードを作成したいと考えていました。こんな時に必要なRailsの機能がForm Objectです!
Form Objectについての説明は割愛して、自分が上記の実装をVue × Railsどのように行なったのかを書いていきたいと思います。
実装する順番としては
- モデルの作成
↓
- コントローラーの編集
↓
- Form Objectの作成
↓
- Vueでのフォーム作成
モデルの作成
まずはモデルの作成です。
上記のDB設計をもとにモデルを作成すると以下のようになります。
# app/models/question_block.rb
class QuestionBlock < ApplicationRecord
  # association =============
  belongs_to :profile_block
  has_many :question_items, dependent: :destroy
end
class QuestionItem < ApplicationRecord
  # association =============
  belongs_to :question_block
end
※ モデルの中にあるprofile_blockというのは、profile_block has_many question_blocksの関係でアソシエーションを結んでいるだけの関係にある親モデルです。
コントローラーの編集
今回は親であるquestion_blockの作成機能を使用します。
# app/controllers/api/v1/question_blocks_controller.rb
module Api
  module V1
    class QuestionBlocksController < ApplicationController

      def create
        @question_block_item_register = QuestionBlockItemRegister.new(set_params)

        if @question_block_item_register.save
          render json: @question_block_item_register
        else
          render json: @question_block_item_register.errors, status: :bad_request
        end
      end

      private

      def set_params
        params.permit(
          :question_title, :question_item_content1,
          :question_item_answer1, :question_item_content2, :question_item_answer2, :question_item_content3,
          :question_item_answer3, :current_user).merge(profile_block_id: ProfileBlock.find_by(user_id: User.find(current_user.id)).id)
      end
    end
  end
end
set_paramsの箇所で複数のquestion_itemのパラメータを受け取ることができるようになります。
def set_params
  params.permit(
    :question_title, :question_item_content1,
    :question_item_answer1, :question_item_content2, :question_item_answer2, :question_item_content3,
    :question_item_answer3, :current_user).merge(profile_block_id: ProfileBlock.find_by(user_id: User.find(current_user.id)).id)
end
最後にmergeしている箇所ですが、これはForm Objectの中ではcurrent_userを使用することができないため、パラメータとして渡しておく必要があるためです。自分はdeviseを使用しているため、current_userを使用することで、question_blockの親であるprofile_blockを紐づけるためのprofile_block_idのパラメータを渡すことができます。
また、@question_block_item_register.attributesとすることで、JSONの値を取得できます。
Form Objectの作成
Form Objectを作成するにあたり、必要そうなものをまずはincludeします。QuestionBlockItemRegisterは仮のモデルとなるため、ActiveModelをincludeしておく必要が会います。これにより、バリデーション機能など各モデルの機能をForm Object内で使用することができます。
# app/forms/question_block_item_register.rb
class QuestionBlockItemRegister
  include ActiveModel::Model
  include ActiveModel::Attributes
  include ActiveModel::Validations
end
次にパラメータを受け取る値をattributeを使用してForm Object内で定義します。これはコントローラーで指定した各パラメーターの値の定義です。
# app/forms/question_block_item_register.rb
class QuestionBlockItemRegister
  include ActiveModel::Model
  include ActiveModel::Attributes
  include ActiveModel::Validations

  attribute :question_title,         :string
  attribute :question_item_content1, :string
  attribute :question_item_answer1,  :string
  attribute :question_item_content2, :string
  attribute :question_item_answer2,  :string
  attribute :question_item_content3, :string
  attribute :question_item_answer3,  :string
  attribute :profile_block_id,       :integer
end
次にバリデーションも定義してしまいましょう。これもモデルで定義する時と同じように設定できます。question_item_answer1以降のpresence: trueを指定しない理由ですが、question_blockが持つitemの数は必ずしも3つではなく、2つ、1つでも登録できるようにするためです。
# app/forms/question_block_item_register.rb
class QuestionBlockItemRegister
  include ActiveModel::Model
  include ActiveModel::Attributes
  include ActiveModel::Validations

  attribute :question_title,         :string
  attribute :question_item_content1, :string
  attribute :question_item_answer1,  :string
  attribute :question_item_content2, :string
  attribute :question_item_answer2,  :string
  attribute :question_item_content3, :string
  attribute :question_item_answer3,  :string
  attribute :profile_block_id,       :integer

  # validation =============
  validates :question_title,         presence: true,        length: { maximum: 30 }
  validates :question_item_content1, presence: true,        length: { maximum: 30 }
  validates :question_item_answer1,  presence: true,        length: { maximum: 30 }
  validates :question_item_content2,                        length: { maximum: 30 }
  validates :question_item_answer2,                         length: { maximum: 30 }
  validates :question_item_content3,                        length: { maximum: 30 }
  validates :question_item_answer3,                         length: { maximum: 30 }
  validates :profile_block_id,        presence: true
end
最後にDBに登録する際のトランザクションを記述します。
# app/forms/question_block_item_register.rb
class QuestionBlockItemRegister
  include ActiveModel::Model
  include ActiveModel::Attributes
  include ActiveModel::Validations

  attribute :question_title,         :string
  attribute :question_item_content1, :string
  attribute :question_item_answer1,  :string
  attribute :question_item_content2, :string
  attribute :question_item_answer2,  :string
  attribute :question_item_content3, :string
  attribute :question_item_answer3,  :string
  attribute :profile_block_id,       :integer

  # validation =============
  validates :question_title,         presence: true,        length: { maximum: 30 }
  validates :question_item_content1, presence: true,        length: { maximum: 30 }
  validates :question_item_answer1,                         length: { maximum: 30 }
  validates :question_item_content2,                        length: { maximum: 30 }
  validates :question_item_answer2,                         length: { maximum: 30 }
  validates :question_item_content3,                        length: { maximum: 30 }
  validates :question_item_answer3,                         length: { maximum: 30 }
  validates :profile_block_id,        presence: true

    def save
    return if invalid?
    ActiveRecord::Base.transaction do
      question_block = QuestionBlock.create!(title: question_title, profile_block_id: profile_block_id)

      question_block.question_items.create!(content: question_item_content1, answer: question_item_answer1) if question_item_content1.present?
      question_block.question_items.create!(content: question_item_content2, answer: question_item_answer2) if question_item_content2.present?
      question_block.question_items.create!(content: question_item_content3, answer: question_item_answer3) if question_item_content3.present?
    end
    true
  end
end
saveメソッドについてはクラスメソッドとなるので、先ほどcreateアクション内で使用しているメソッド名と同じにします。ここは、普段使用しているDB保存のためのsaveメソッドとは異なるのでお間違いなく。
def create
  @question_block_item_register = QuestionBlockItemRegister.new(set_params)

  if @question_block_item_register.save
    render json: @question_block_item_register.attributes
  else
    render json: @question_block_item_register.errors, status: :bad_request
  end
end
ActiveRecord::Base.transactionを使用する理由ですが、これはトランザクションを一つにまとめることができる機能です。なぜまとめる必要があるのかというと、create!メソッドは使用された時点で成功すればDBに登録されますが、一度に複数モデルを作成するForm Objectでは複数モデルが全て登録されたことを保証するためです。もし、仮にQuestionBlock.create!が成功して、question_block.question_items.create!が失敗すると、itemのないただのブロックが作成されてしまいます。
ActiveRecord::Base.transaction do
  question_block = QuestionBlock.create!(title: question_title, profile_block_id: profile_block_id)

  question_block.question_items.create!(content: question_item_content1, answer: question_item_answer1) if question_item_content1.present?
  question_block.question_items.create!(content: question_item_content2, answer: question_item_answer2) if question_item_content2.present?
  question_block.question_items.create!(content: question_item_content3, answer: question_item_answer3) if question_item_content3.present?
end
また、トランザクションが完了した後にtrueを返却しなければなりません。なぜかというと、@question_block_item_register.saveは普段使用しているsaveメソッドと同様に、真偽値を返す必要があるためです。trueを返却しなければnilが返却されることになり、必ず条件分岐はelseの結果を返すことになります。
def save
  return if invalid?
・
・
  true # 必ず必要
end
Vueでのフォーム作成
最後にvueでパラメータを送ってあげます。Vueのtemplateタグ内は自分のPF上の見た目を表すコードになるため割愛します。どうやってaxiosを使用してパラメータを渡すかのみを使用します。
まずフォームのコンポーネントのscriptタグ内は以下のようになります。
<script>
export default {
  data() {
    return {
      questionBlock: {
        title: "",
      },
      questionItem: {
        content: "",
        answer: "",
      },
    };
  },
  methods: {
    ...mapActions({
      createQuestionBlock: "questionBlocks/createQuestionBlock",
    }),
    hundleCreateQuestionBlock(questionBlock, questionItem) {
      if (questionBlock.title == "" || questionItem.content == "") return;
      this.createQuestionBlock({
        questionBlock: questionBlock,
        questionItem: questionItem,
      });
    },
  },
};
</script>
重要なのはvuexにて定義しているcreateQuestionBlockメソッドの引数をオブジェエクトを使用して渡していることです。なぜかというと、vuexのactionsのメソッド、mutationsのメソッドは引数を一つしか持てないためです。そのため、オブジェクトの中に入れることで、引数を一つに保ちます。
...mapActions({
  createQuestionBlock: "questionBlocks/createQuestionBlock",
}),
hundleCreateQuestionBlock(questionBlock, questionItem) {
・
・
  this.createQuestionBlock({
    questionBlock: questionBlock,
    questionItem: questionItem,
  });
次にvuexで非同期処理を行うcreateQuestionBlockメソッドについてです。
createQuestionBlock({ commit }, { questionBlock, questionItem }) {
  const params = {
    question_title: questionBlock.title,
    question_item_content1: questionItem.content,
    question_item_answer1: questionItem.answer,
  };
  axios
    .post("question_blocks", params)
    .then((response) => {
      commit("addQuestionBlock", response.data);
    })
    .catch((err) => console.log(err.status));
},
引数をオブジェクトを使用して表しています。ここでサーバー側で受け取るパラメータを定数paramsとして定義します。
const params = {
  question_title: questionBlock.title,
  question_item_content1: questionItem.content,
  question_item_answer1: questionItem.answer,
};
あとはそのパラメータをpostとして送信するだけです。
post("question_blocks", params)
少し雑だったかもしれませんが、全部読めば外観はつかめたのではないかなと思います。特にVue側でのparamsの値に変換しておく方法はあまり記事では見かけませんでした。
const params = {
  question_title: questionBlock.title,
  question_item_content1: questionItem.content,
  question_item_answer1: questionItem.answer,
};
この記事がRails × Vueの実装で誰かのお役に立てればと思います。
参考文献
- フォームオブジェクトについて
- Vuexでのaction, mutationの引数指定での注意点
【Vue】vee-Validatorのメッセージをリセット
vee-Validatorの副作用
こんにちは!大ちゃんの駆け出し技術ブログです。
今日は文章量少なめです💦
PF制作時にvee-Validatorのフォームで少し困ったことがありました。
下記のように入力フォームにバリデーションをしていたとします。未入力の場合バリデーションメッセージを表示すると言うものですね。

この入力フォームはvuetifyのダイアログを使用していたのですが、この入力フォームは閉じる時に値のリセットを行います。
clearTextBlock() {
  this.textFormat = {};
},
しかし、これを行うと不具合が生じました。
何も入力しないでダイアログを閉じて再度入力フォームを開くと、バリデーションメッセージが表示された状態で開かれてしまいます。
何も入力しないでダイアログを閉じる

↓
ダイアログを開く
これが起きる理由として、clearTextBlockメソッドが実行されることでフォームが空になったと認識されてしまうためです。空になったと認識されれば、フォームに指定しているValidationProviderが実行されてしまい、未入力と判断されてしまいます。結果、再度ダイアログを表示した時に、バリデーションメッセージが表示されてしまうわけです。
解決方法
これについては解決方法が複数あるようでしたが、公式の情報を参考に実装しました。
Validation Observer | VeeValidate
フォームの値を空にする処理の後に、vee-Validatorのバリデーションを一度リセットすることができる処理を入れます。
clearTextBlock() {
  this.textBlock = {};
  this.$refs.observer.reset();
},
これにより、ダイアログを閉じる際に表示されていたバリデーションメッセージが消え、次に開く時にはバリデーションメッセージが表示されていないダイアログを表示できます。
意外と簡単に解決できてよかったです。
参考文献
コメント
次はいよいよ50記事目です!目標としていただけあってすごく嬉しい!
【Gem】ActiveModelSerializers
はじめに
こんにちは!大ちゃんの駆け出し技術ブログです。
RailsでAPIモードを使用してJSONデータを受け取る時にActiveModelSerializersというgemがとても重宝したので紹介します。JSONのレンダーを簡易的に行ってくれるので、Vue.jsなどを使用する場合は是非こちらのgemを使ってみてください。
インストール
現在の最新版を使用します。Gemファイルに記載し、bundle install
# Gemfile
gem 'active_model_serializers', '~> 0.10.0'
$ bundle install
Installing jsonapi-renderer 0.2.2
Installing case_transform 0.2
Fetching active_model_serializers 0.10.12
Installing active_model_serializers 0.10.12
JSONを返却するシリアライザーを作成します。作成方法は下記コマンドのとおりです
$ rails g serializer モデル名
今回自分がこちらのgemで使用したのはUserモデルとProfileモデルですので、下記のようにコマンドを実行しました。コマンド実行後、app/serializers/配下にシリアライザ用のファイルが作成されます。
$ rails g serializer User
      create  app/serializers/user_serializer.rb
$ rails g serializer Profile
      create  app/serializers/profile_serializer.rb
デフォルトでは中身がattributes :idと記載されているファイルが作成されます。
class User < ActiveModel::Serializer
  attributes :id
end
attributesにはJSONで取得したい値を記述します。今回自分のUserモデルでは:nameカラム、:imageカラムを取得したいので追加しました。
class UserSerializer < ActiveModel::Serializer
  attributes :id, :name, :image
end
また、アソシエーション関係にあるJSONの値も取得したい場合、アソシエーションを表すhas_many, has_oneなどを記載すればアソシエーション関連の値も取得できます。
class UserSerializer < ActiveModel::Serializer
  attributes :id, :name, :image
    has_one :profile
end
Profileモデルの属性も同様に指定します。
class ProfileSerializer < ActiveModel::Serializer
  attributes :id, :birthday, :day_of_joinning, :height, :gender, :blood_type, :prefecture_id
  belongs_to :user
end
以上で準備完了です!
ほんとにお手軽です!
使用例
ではJSONを実際に取得してみます。
- User情報一覧の取得の場合
http://localhost:3000/api/v1/users/
def index
  @users = User.all
  render json: ActiveModel::Serializer::CollectionSerializer.new(
    @users,
    serializer: UserSerializer
  ).to_json
  end
ActiveModel::Serializer::CollectionSerializerが気になるかと思いますが、リソースの集合をシリアライザで表現する時に使用するようです。だいたいリソースが複数となるindexアクションでしか使用しません。serializer: UserSerializerとすることで使用するシリアライザを指定します。
返却されるJSON
[{"id":8,"name":"大ちゃん","image":"~~~~省略~~~~-192.png","profile":{"id":5,"birthday":"2021-04-02T00:00:00.000Z","day_of_joinning":"2021-04-04T00:00:00.000Z","height":154,"gender":"male","blood_type":"B","prefecture_id":13}}]
現在UserのレコードとProfileのレコードが1つずつしかないので返却される値は少なく見えますが、ちゃんと値が返ってきています。
- Profile一覧の取得の場合
http://localhost:3000/api/v1/profiles/
def index
   @profiles = Profile.all
  render json: ActiveModel::Serializer::CollectionSerializer.new(
    @profiles,
    serializer: ProfileSerializer
  ).to_json
end
返却されるJSON
[{"id":5,"birthday":"2021-04-02T00:00:00.000Z","day_of_joinning":"2021-04-04T00:00:00.000Z","height":154,"gender":"male","blood_type":"B","prefecture_id":13,"user":{"id":8,"name":"大ちゃん","image":"~~~~省略~~~~-192.png"}}]
シリアライザーの値をメソッドで定義する
返却するJSONの値をシリアライザ側で加工して渡すこともできます。
例えば、先ほど取得したプロフィールカラムの性別を日本語に加工したいとしましょう。
"gender":"male"
⇒ "gender":"男性"
この場合enum_helpを使用していることが前提になります。
# config/locales/enums.ja.yml
ja:
  enums:
    profile:
      gender:
        male: "男性"
        female: "女性"
シリアライザで変換したい場合、以下のようにメソッドを定義することで変換が可能です。
class ProfileSerializer < ActiveModel::Serializer
  attributes :id, :birthday, :day_of_joinning, :height, :gender, :blood_type, :prefecture_id
  belongs_to :user

  def gender
    object.gender_i18n
  end
end
objectはモデル自体です。gender_i18nとすることでenum_helpのyamlファイルで定義した値に変換することができます。元の値をJSONファイルで取得する必要がない場合、attributes自体に変更は必要ありません。これで日本語に変換された値を取得できます。
プロフィールのprefecture_idも変換します。prefecture_idはActive Hashを使用して定義しています。
class Prefecture < ActiveHash::Base
  self.data = [
    { id: 1, name: '北海道' }, { id: 2, name: '青森県' }, { id: 3, name: '岩手県' },
    { id: 4, name: '宮城県' }, { id: 5, name: '秋田県' }, { id: 6, name: '山形県' },
    { id: 7, name: '福島県' }, { id: 8, name: '茨城県' }, { id: 9, name: '栃木県' },
    { id: 10, name: '群馬県' }, { id: 11, name: '埼玉県' }, { id: 12, name: '千葉県' },
    { id: 13, name: '東京都' }, { id: 14, name: '神奈川県' }, { id: 15, name: '新潟県' },
    { id: 16, name: '富山県' }, { id: 17, name: '石川県' }, { id: 18, name: '福井県' },
    { id: 19, name: '山梨県' }, { id: 20, name: '長野県' }, { id: 21, name: '岐阜県' },
    { id: 22, name: '静岡県' }, { id: 23, name: '愛知県' }, { id: 24, name: '三重県' },
    { id: 25, name: '滋賀県' }, { id: 26, name: '京都府' }, { id: 27, name: '大阪府' },
    { id: 28, name: '兵庫県' }, { id: 29, name: '奈良県' }, { id: 30, name: '和歌山県' },
    { id: 31, name: '鳥取県' }, { id: 32, name: '島根県' }, { id: 33, name: '岡山県' },
    { id: 34, name: '広島県' }, { id: 35, name: '山口県' }, { id: 36, name: '徳島県' },
    { id: 37, name: '香川県' }, { id: 38, name: '愛媛県' }, { id: 39, name: '高知県' },
    { id: 40, name: '福岡県' }, { id: 41, name: '佐賀県' }, { id: 42, name: '長崎県' },
    { id: 43, name: '熊本県' }, { id: 44, name: '大分県' }, { id: 45, name: '宮崎県' },
    { id: 46, name: '鹿児島県' }, { id: 47, name: '沖縄県' }
  ]
end
Active Hashへの値の変換方法は[object.prefecture.変換したい値]とすることで変換できます。今回の場合、object.prefecture.idでPrefectureモデルで指定した都道府県ID、object.prefecture.nameで都道府県名を取得できます。今回は都道府県名を取得します。
# app/serializers/profile_serializer.rb
class ProfileSerializer < ActiveModel::Serializer
  attributes :id, :birthday, :day_of_joinning, :height, :gender, :blood_type, :prefecture_id
  belongs_to :user

  def gender
    object.gender_i18n
  end

  def prefecture_id
    object.prefecture.name
  end
end
最後に日付のフォーマットも整形したいですね。不格好です。
"birthday":"2021-04-02T00:00:00.000Z"
"day_of_joinning":"2021-04-04T00:00:00.000Z"
strftimeメソッドを使えば簡単にフォーマットを整形できます。
# app/serializers/profile_serializer.rb
class ProfileSerializer < ActiveModel::Serializer
  attributes :id, :birthday, :day_of_joinning, :height, :gender, :blood_type, :prefecture_id
  belongs_to :user

  def gender
    object.gender_i18n
  end

  def prefecture_id
    object.prefecture.name
  end

  def birthday
    object.birthday.strftime("%F")
  end

  def day_of_joinning
    object.day_of_joinning.strftime("%F")
  end
end